
Connect with me
2
As a software engineer with over 6 years of experience, I specialize in developing scalable and efficient solutions using C, C++, Python, Node.js, and React. My proficiency in databases includes MySQL, Firebase, and MongoDB. I'm passionate about staying up-to-date with the latest technological advancements, and I enjoy exploring new technologies and frameworks to stay ahead in the ever-changing tech landscape. I'm currently working on Voice Agents projects and have made significant contributions to the open-source community through Hacktoberfest and other collaborations. I'm active on GitHub with a network of 68 followers and 135 public repositories.
Tirunelveli

cover imageI’ve been working as a full-stack developer at a startup for the past 3+ years. Recently, I decided to switch companies to explore new challenges and learning opportunities.Over the last few weeks, I attended 10+ interviews and ended up with 3 offers. More importantly, I learned a lot about communication, pressure, and the difference between knowing something and explaining it clearly.I also recorded most of my online interviews to track my mistakes and improve over time. I used a simple Python script to record the audio.Some rounds went well. Some didn’t. But by the end of it, I understood myself better than I had in years of working as an engineer.Here are the biggest lessons I learned.The first round, and realizing communication is a skillThe first round felt easy. Intro questions, project discussion, small system design.I walked in confident. I had built production voice agents, worked on infrastructure migrations, and knew my work deeply.The interviewer asked me to explain one of my projects.I started talking about Twilio, WebSockets, streaming audio, EHR integrations, Athena, ECW, strategy patterns everything.A few minutes in, I noticed his face.He wasn’t following.So I sped up.That made it worse.By the end, I had explained a lot, but very little had actually landed. He asked me to repeat things I thought I’d already explained clearly.That was my first lesson:Interviews are not just testing what you know. They test whether you can transfer what you know into someone else’s head clearly and quickly.If communication fails, your knowledge becomes invisible.The Twitter feed question, and the importance of clarificationOne interviewer asked me to design a Twitter feed.A million users. Each follows around a thousand people. Design the schema and read query.I immediately started solving it.Tables. Indexes. Joins. Redis caching.Then he asked:“What happens when the table grows to hundreds of millions of rows?”I kept defending caching.He kept hinting that I should rethink the data model itself.I didn’t get the round.Later I realized the real mistake happened in the first 30 seconds: I never clarified the problem.I should have asked:What’s the read-to-write ratio?How fresh does the feed need to be?Are users mostly reading their own feed?Fan-out on write or fan-out on read?Instead, I solved the wrong problem confidently.Senior engineers don’t rush to solutions. They rush to clarity first.Speaking faster doesn’t make you sound smarterI discovered something uncomfortable while listening to my recordings:Whenever I got nervous, I started speaking faster.I thought I sounded efficient.In reality, my explanations became harder to follow. My words blended together, my accent became stronger, and I skipped important transitions between ideas.In one interview, I explained interruption handling in our voice agent system — VAD packets, WebSocket interrupts, stopping TTS streams mid-response.I knew the system deeply.But I explained it too quickly.The interviewer asked me to repeat key parts because he couldn’t follow them.That taught me something important:Speaking fast is often a confidence costume. Real confidence sounds calm and slow.The smartest engineers I’ve met rarely rush their words.The notification system, and missing the hintIn another round, I was asked to design a notification system with email, push, and in-app delivery.I designed queues, consumers, retries, and channel separation.Then the interviewer asked:“What happens if both the queue and the consumer fail together?”I kept patching my design:Kafka. Persistence. Backup tables.He kept nudging me toward thinking about reconciliation and delivery guarantees.I ignored the signal and kept defending my original approach.That round taught me something subtle:When interviewers repeat a question differently or say “think about that,” they are redirecting you.That is the moment to stop, reset, and rethink not defend harder.A much better response would have been:“Let me step back for a second. Are you pointing me away from this approach?”That shows adaptability, which matters a lot in senior interviews.Behavioral questions are slower than technical onesOne interviewer asked:“Tell me about a time you disagreed with a teammate.”I answered immediately.Halfway through the story, I realized I picked the wrong example. They were evaluating leadership and collaboration, but my story focused only on technical disagreement.I should have paused before answering.Just 3–5 seconds to think:“What is this question actually testing?”That small pause matters more than people think.Fast answers in behavioral rounds often sound less thoughtful, not more confident.Preparing stories beforehand also helps a lot.Filler words and fear of silenceWatching my recordings was painful for another reason.I noticed how often I said:“Yeah yeah…”“Actually…”“Okay so…”“I think…”Those filler words were not helping me think. They were just filling silence because I was uncomfortable pausing.Eventually I realized:Silence sounds more confident than filler words.Now, when I need time, I simply say:“Let me think about that for a second.”And then I actually pause.It feels strange at first, but it sounds much more professional.The summary I never gaveAfter long explanations, I often ended with:“…and yeah, that’s basically it.”No summary. No closure.The interviewer had to figure out which parts actually mattered.A much stronger ending sounds like this:“So the main reason we picked Gemini was the larger context window, we validated tool calls at the application layer, and the remaining bottleneck was post-call evaluation latency.”That one sentence creates clarity.It shows prioritization, structure, and confidence.Now I actively practice summarizing long explanations into one clean closing sentence.My resume became a question bankOne interviewer asked me about pgvector.I had mentioned it on my resume because I used it briefly during a hackathon.Then came deep questions about chunking, embeddings, retrieval quality, and indexing.Every line on your resume is an invitation for deeper questioning.If you can’t comfortably discuss something for 10 minutes, it probably shouldn’t be there.A weak answer about your own resume creates more doubt than leaving the skill out entirely.What I’m changing nowBy the end of all these interviews, I had a clear list of habits I want to improve:Practice explaining my projects out loudRecord myself and listen carefullySlow down while speakingAsk clarifying questions before solvingTreat hints as redirects, not resistancePause before behavioral answersGet comfortable with silenceRevisit fundamentals regularlyEnd long answers with a short summaryMost importantly:When I feel nervous, I now try to slow down instead of speeding up.The real takeawayInterviews are not purely a test of knowledge.They are a test of whether another engineer can trust that you will communicate clearly, think calmly, and work through problems effectively under pressure.Technical knowledge matters.But the ability to make other people understand your thinking matters just as much.The good part is that communication is also a skill.Which means it can be practiced.And for the first time, I feel like I know exactly what I need to improve and that’s a much better place to start from than blaming nerves, language, or bad luck.Onwards to the next round.

cover imageHow It All BeganI joined a startup during my final semester of college full of dreams, excitement, and absolutely zero clue what was coming.They called it an “internship.” On Day 1, I walked in expecting some hand holding, maybe a slow ramp-up, a buddy to show me around. Instead, I got a quick KT (knowledge transfer) session and a task: “Create a new API endpoint on the existing codebase.”Sounds simple, right? Then I opened the codebase.It wasn’t a codebase. It was a monster. Files everywhere. Folders nested inside folders. Functions calling other functions calling things I couldn’t even find. I sat there staring at my screen thinking, “What even is this?”I walked over to my senior and asked, “Hey, is there any documentation I can refer to?”He smiled and said, “I am the documentation.”That was the moment I realized I wasn’t just learning code. I was learning survival.I pulled out a notebook and a pen yes, actual paper and started writing down every file path, every function name, every weird quirk I discovered. Because in a codebase that big, your memory is a liar. By lunchtime, you’ve already forgotten where that one config file lived.That notebook saved me. And honestly, it taught me my first lesson before I even shipped a single line of code: in a startup, you are your own documentation.four years later, I’m still at this startup. I’ve shipped features, broken production, fixed production, mentored interns, and made every mistake you can think of (and probably a few new ones). Here’s everything I’ve learned along the way.Communication Is the Real SkillI used to think being a good engineer meant writing clean code. It doesn’t. It means being able to explain what you’re doing, why you’re doing it, and what could go wrong clearly and early.If you can’t communicate:You can’t ask for help when you’re stuck (and you will get stuck).Your manager doesn’t know what you’re working on.Other teams build things that conflict with your work.You become invisible which sounds fine until promotion time.Over-communicate. Always. Send that update message. Ask that “dumb” question. Confirm that ambiguous requirement. The five minutes you spend writing a clear Slack message saves hours of cleanup later.Even today, before making a major change, I try to communicate:what I am changing,why I am changing it,possible risks,rollback plans,and expected behavior.That habit alone prevents many problems.Understand the Product Before Understanding the CodeThis is one of the biggest lessons I learned.When joining a startup, many developers immediately try to understand the architecture, framework, or folder structure.But in reality:the codebase is only a reflection of the business.If you do not understand the product, the code will never fully make sense.For example:in healthcare systems, insurance workflows, appointments, claims, and eligibility checks all affect how APIs behave.Without understanding the real business flow, many parts of the code look “weird.”Later you realize: the code is not weird, the business itself is complicated.Once I started understanding:why users use the product,how customers think,what business problems exist,and how operations work,reading the code became much easier.Because then every endpoint started telling a story instead of looking like random logic.Respect Legacy CodeOne mistake many developers make they underestimate old code.As engineers, we continuously improve. We learn cleaner patterns, better architecture, and new technologies.So when we see old code, our first reaction is often:“Why did they write it like this?”But startup experience taught me something important:old code usually contains old pain.That “ugly” logic may exist because:some customer workflow breaks without it,an external API behaves unpredictably,or production once failed in a very specific edge case.Never rewrite legacy code until you fully understand:the business logic,dependencies,edge cases,and historical reasons behind it.Sometimes the dangerous code is not the messy looking code.Sometimes the dangerous code is the “clean refactor” done by someone who didn’t understand the system deeply enough.The rule I follow now: if you’re not 100% confident why a piece of legacy code exists, don’t touch it. Ask someone. Read the git blame. Check the original ticket. Then decide. because I breaked production few times by refactoring the old code (:sweatsmile)If You Do Something More Than Twice, Automate ItThis mindset saved me a lot of time.In startups, repetitive manual work slowly drains energy.For example, in my case: every time I wanted to deploy to a test server, I had to:open GitHub Actions,select branch names,choose environments,and manually trigger workflows.It sounds small.But small friction repeated daily becomes expensive.So I wrote a simple CLI script to automate the process.That small automation improved:speed,focus,and consistency.After that, I started automating many repetitive tasks.One thing startup life teaches quickly:engineers should not repeatedly do work that machines can do reliablySelf-Review Prevents Embarrassing BugsOne habit that helped me a lot reviewing my own PR before others review it.Earlier, after finishing a feature, I immediately created a PR.Later I realized many mistakes become obvious if you step away for a few minutes and review calmly.Things like:forgotten logs,wrong variable names,debug code,edge cases,null checks,deployment risks,and typo mistakes.Now before pushing, I usually ask:“If I was reviewing someone else’s code, what problems would I point out?”That simple mindset catches many issues early.Learn to Say “No”In startups, there is always more work.More tasks.More urgency.More ideas.More deadlines.At first, I tried saying “yes” to everything.Eventually I learned: saying yes to everything usually means:context switching,rushed work,burnout,and lower quality.Good engineers are not people who accept everything blindly.Good engineers understand priorities.Sometimes saying:“This needs more time.”or“This may break existing flows.”or“We should not rush this deployment.”is actually responsible engineering.Track Your MistakesOne underrated thing I started doing was tracking mistakes I made.Not to feel bad.But to avoid repeating them.For example:deployment mistakes,debugging assumptions,poor estimates,missing edge cases,communication gaps,production incidents.Over time, patterns start appearing. You realize your biggest enemy is not lack of intelligence.It is repeated carelessness.Tracking mistakes improves self-awareness very quickly.I also tracked wins:successful releases,difficult bugs solved,systems improved,automation built,and customer issues resolved.Because during difficult periods, those reminders help you see growth.Build Good Relationships With Fellow DevelopersOne thing that helped me a lot during my startup journey was building good relationships with other developers.In startups especially, every developer usually has different strengths:someone is good at debugging,someone understands infrastructure deeply,someone writes clean architecture,someone knows the business logic well,someone stays calm during production issues,and someone can explain complex things simply.If you maintain good communication and healthy relationships with teammates, you naturally learn from each other every day.Many things cannot be learned from documentation alone.For example:hidden deployment tricks,production debugging approaches,business edge cases,architecture decisions,and lessons from past failures.A strong team culture makes learning much faster because people openly share knowledge instead of protecting it.I also learned that helping others is one of the fastest ways to grow yourself.Sometimes while explaining a bug or teaching a junior developer, you realize gaps in your own understanding. Teaching forces clarity.And during difficult production issues, good relationships matter even more.When systems break at midnight, people work better with teammates they trust and communicate comfortably with.Startup life already has enough pressure.Good teammates make that journey much easier and much more enjoyable.At the end of the day, most people don’t remember only the code they wrote.They remember:the people they learned from,the teammates who helped during difficult releases,the debugging sessions,and the feeling of building something together.Prioritize Product Value Over Perfect CodeThe perfect engineering is not always the highest priority.As developers, we naturally love:clean architecture,optimized code,One lesson I learned in startups is thatperfect abstractions,and elegant systems.But startup reality is different.Our CTO used to say something like:“Having highly efficient code without customers is useless.”At first, I didn’t fully understand that statement. Later I realized what he meant.A startup survives only if it solves customer problems fast enough.Sometimes that means:shipping a simpler solution,compromising on perfect architecture,delaying optimization,or writing code that is “good enough for now.”That does NOT mean writing bad code carelessly. It means understanding business priorities.For example:if optimizing an API from 200ms to 50ms takes two weeks, but customers are waiting for a critical feature, then the feature may provide more business value than the optimization.In startups, timing matters a lot.Many engineers make the mistake of overengineering too early:building complex abstractions,designing for massive scale before users exist,or spending weeks optimizing systems nobody is using heavily yet.Good startup engineering is often about balance.You need to ask:Does this optimization actually matter now?Is this complexity solving a real business problem?Are we building for current reality or imaginary future scale?Over time, I learned:perfect code is valuable,but solving real customer problems is what keeps the company alive long enough to improve the code later.Sometimes “done and useful” is more valuable than “perfect but delayed.”The important thing is knowing:where compromises are acceptable,and where they become dangerous technical debt.That judgment only comes with experience.Final ThoughtsWhen I joined as an intern, I thought software engineering was mainly about writing code.After 4+ years in a startup, I realized:engineering is actually about:communication,decision making,understanding systems,reducing chaos,and helping teams move forward safely.The code is only one part of it.And honestly, I’m still learning.Every production issue,every failed deployment,every weird bug,every legacy system,every difficult release teaches something new.That’s the beautiful thing about startups.They force you to grow faster than you expected.Sometimes painfully. But meaningfully.

cover imageThere are two kinds of production incidents.The first kind gives you signals. Metrics drift slightly off baseline. Latency edges upward. Dashboards turn yellow long before anything turns red. You have time to reason about it.The second kind doesn’t negotiate. It lets you sleep peacefully and then informs you in the morning that your server died multiple times overnight.This was the second kind.The SetupWe’re building a voice agent platform.Calls come in from users. Audio streams over WebSocket. We integrate with Twilio for real-time media streams. AI agents process the conversation, decide what to say next, and occasionally invoke tools. Some of those tools query our database to fetch context or perform actions.Architecturally, nothing unusual. A fairly standard real-time pipeline: streaming input, AI orchestration, tool execution, database lookups.And everything had been working fine.Then one night, one of our Kubernetes pods limited to 1GB of memory started crashing repeatedly. There was no deployment. No configuration change. No obvious traffic spike. No infrastructure event. Just restarts.That’s always unsettling. When nothing changed, but something clearly broke.The First Suspect: StreamingWhen memory spikes in a real-time system, your instinct immediately points to streaming.WebSockets can buffer unexpectedly. Audio chunks might accumulate if something downstream slows down. Garbage collection might not keep up under bursty traffic. Maybe some array was growing quietly in memory.All of those were reasonable hypotheses.We spun up a test environment and tried to simulate the issue. We created parallel calls. We streamed audio continuously. We monitored memory closely, expecting to see the same runaway pattern.Nothing happened.Memory usage remained stable. The heap grew and shrank normally. No vertical spikes. No crashes.That almost made it worse. Because in production, it was reproducible — just not consistently. During US night hours, when traffic was low, we triggered calls manually and sometimes we could reproduce the crash. Other times, everything behaved perfectly.Intermittent, probabilistic failures are far harder to reason about than deterministic ones.Heap Snapshots and False LeadsNext, we went for heap snapshots using V8 and Chrome DevTools. If something large was being retained, the snapshot would reveal it.process.on("SIGUSR1", async () => { console.log("Received SIGUSR1 event on proc. Executing heap snapshot."); const fs = require("fs"); const v8 = require("v8"); function writeHeapSnapshot(filename = `/profiling/heap-${Date.now()}.heapsnapshot`) { const snapshotStream = v8.getHeapSnapshot(); const fileStream = fs.createWriteStream(filename); snapshotStream.pipe(fileStream); console.log(`Heap snapshot saved as ${filename}`); }writeHeapSnapshot(); });previewWe added a signal handler to our Node.js process so we could trigger heap snapshots on demand. The plan was simple: wait until memory rose, send the signal, capture the snapshot, and analyze it offline.There’s a catch, though. Generating a heap snapshot requires additional memory. If your pod is already close to its limit, the snapshot process itself can push it over.That’s exactly what happened.Sometimes the pod crashed before the snapshot completed. Other times it succeeded, but the analysis didn’t reveal anything clearly catastrophic. We saw objects. We saw JSON structures. We saw logs. But nothing that screamed “this is it.”We compared multiple snapshots normal state versus spike moments. The differences weren’t obvious enough to explain a near 1GB allocation.Meanwhile, the day was progressing. It was evening in India. Which meant it was morning in the US.Traffic was about to return.Watching It Happen LiveAs calls started coming in, we stopped theorizing and simply watched production.There’s something tense about staring at live memory graphs when you know a crash is possible.At first, everything looked normal. Heap usage was steady. CPU was fine. Calls were connecting. Conversations were flowing.One call completed. No issue.Another started. Still stable.A few more came in. The graph moved slightly, but within normal range. For a moment, we thought maybe the issue had somehow resolved itself.Then it happened.The memory line didn’t drift upward gradually. It didn’t climb in a smooth curve. It jumped. A sharp vertical spike as if a massive object had been allocated in a single operation.Within seconds, the pod was terminated due to OOM killedRestarting.This wasn’t a leak accumulating over time. This was a sudden allocation.Scaling Didn’t Save UsUnder pressure and with leadership understandably concerned we tried the obvious mitigation: horizontal scaling.If one pod was overloaded, maybe splitting the traffic would help. So we spun up an additional pod and routed traffic between them.The assumption was simple: less load per instance means less memory pressure.It didn’t help.Both pods eventually crashed.That clarified something important. Scaling helps when the issue is cumulative load. It does not help when a single request is catastrophic. If one request allocates hundreds of megabytes, any pod that processes that request will fail independently.The problem wasn’t load distribution. It was logic.Observing Memory in Real TimeInstead of relying on snapshots, I added periodic memory logging directly in the application. Node.js exposes memory usage metrics like rss, heapTotal, heapUsed, external, and arrayBuffers. We logged them every few seconds.if you are a nodejs dev you might know what each mean if not for yourss (Resident Set Size): The total memory allocated for the process execution in main memory, including the heap, stack, and code segments.heapTotal: The total size of the allocated memory heap, which is managed by the V8 engine and stores objects, strings, and closures.heapUsed: The actual memory currently being used within the heapTotal. This is often the most relevant parameter for identifying memory leaks in the JavaScript code itself.external: Memory used by C++ objects that are bound to JavaScript objects managed by V8.arrayBuffers: Memory allocated for ArrayBuffers and SharedArrayBuffers, which is also included in the external valueSo I added below code on our codebase to log the memory usage over period of timesetInterval(() => { const memory = process.memoryUsage();for (let key in memory) { console.log(`[MEMORY]${key}: ${(memory[key] / 1024 / 1024).toFixed(2)} MB`);}}, 5000);so what we thought was If streaming is issue we see the increase of arrayBuffers or externalBut supersinlgly we see the heapUsed is get increased and The pattern was consistent.Then suddenly, heapUsed would spike dramatically hundreds of megabytes in a short window and the pod would be killed.This ruled out slow leaks and twilio audio streams Garbage collection wasn’t failing. Something large was being allocated all at once.The PatternEventually, our one of dev noticed something interesting in the logs around the spike.A tool call.More specifically, a tool call with an empty object as parameters.Our AI agents can invoke tools. One of those tools performs a database search and expects a required parameter to search on the collection so what we saw in log was empty objectparams: {}At first glance, it didn’t look dangerous. It was syntactically valid. It didn’t throw an error. The function executed normally.But that empty object changed everything. what we do was after receving the params we search on db using thatdb.collection.find(params)Our collection contained around one million documents.When you execute Model.find({}) in MongoDB, you are not asking for nothing. You are asking for everything.MongoDB did exactly what we requested. It returned all documents.The Node.js driver then deserialized those documents into JavaScript objects in memory before our code could process them. That meant potentially hundreds of megabytes being allocated almost instantly.Inside a pod limited to 1GB.The vertical memory spike finally made sense.This wasn’t a memory leak. It wasn’t streaming buffers accumulating. It wasn’t garbage collection lag. It was a full-collection query triggered by an empty filter.Why It Was So Hard to ReproduceIt didn’t happen on every call.Only one agent had access to that tool. Only certain conversation flows triggered it. Only when the AI decided the tool was relevant. And only when the model generated an empty object instead of a properly populated parameter set.Unless that exact probabilistic sequence occurred, the system behaved perfectly.Traditional bugs are deterministic. Given the same input, you get the same output.AI-integrated systems introduce probabilistic behavior. The model didn’t crash the server directly. It generated a syntactically valid tool call that was semantically unsafe. And we trusted it.That trust was the real bug.The FixOnce understood, the fix was straightforward.We added strict schema validation before executing any tool call. If required parameters were missing, the call was rejected immediately. Empty filters were explicitly disallowed. We chose to fail fast instead of querying blindly.There was no infrastructure change. No scaling adjustment. No tuning of garbage collection.Just validation.After that, the crashes stopped. it almost took for us 24 hours to find and fix.

In Part 1, we established a fundamental truth: LLMs are probability engines, not reasoning machines. They don’t “know” anything; they predict the next likely token based on patterns seen during training.Now, we move from theory to practice. If an LLM is a probability engine, then Prompt Engineering is the art of steering those probabilities.In this post, we’ll cover the mechanics of how you do that:The “Butterfly Effect” of word choice and how to harness it.Why prompt structure (XML vs. Markdown) is a semantic signal, not just aesthetic.Understanding LLM “personality” and behavioral analysis.Why LLMs are bad at reasoning.How Word Choice Creates Dramatic Output DifferencesYou might think that “asking nicely” or changing a synonym shouldn’t matter much to a massive AI model. You’d be wrong.In the world of LLMs, we see what I call the “Butterfly Effect.” Minor, semantic-preserving changes to a prompt can lead to massive shifts in the model’s output. This isn’t just observation; it’s researched fact. A study on The Butterfly Effect of Altering Prompts demonstrated that small phrasing variations can drastically alter performance.Recent research tested 26 prompt engineering principles and found significant patterns:Emotional stimuli (“This is very important to my career”) can yield +20% accuracy in some cases.Reasoning language (“take a deep breath and work step-by-step”) provides measurable improvement on complex tasks.Larger models show bigger improvements from these principles (10–100%+ boost).The Power of “Magic Words”Specific phrases act as levers for the model’s latent space. This concept is explored further in How Prompt Keywords (Magic Words) Optimize Language Model Performance, which details how certain triggers activate high-competence pathways.Some proven triggers include:“Let’s think step-by-step” (The famous Zero-shot CoT trigger).“Let’s work this out in a step-by-step way to be sure we have the right answer.”“First, let’s think about this logically” combined with grounding instructions like “Use only the facts provided.”From the research on What Works Surprisingly Well, we know that:Starting with a brief greeting can set the tone, complexity, and demeanor of the response.Role-based framing activates relevant token relationships.Specific vocabulary choices influence output style more than length purely by association.Vocabulary as Domain AnchoringThis brings us to a critical mechanic: Domain Anchoring. As discussed in Prompt Engineering: How Prompt Vocabulary affects Domain Knowledge, using domain-specific jargon doesn’t just make you sound professional it forces the model to look into a specific “cluster” of its training data.Positive vs. Negative Framing:Positive: “You are focused on accuracy and depth.” (Activates desired behaviors)Negative: “Do not provide shallow answers.” (Less effective, as it primes the concept of “shallow answers”)Token Efficiency Tips:Avoid filler: Words like “please,” “could you,” and “thank you” consume tokens without adding information value (though they can affect tone).Punctuation: Primarily serves written text, not instruction clarity.Conciseness: 500 words of context can often be reduced to 50 words of clear objectives.Concrete Examples1. The Specificity EffectVague: “Tell me about Paris.”Result: Generic overview, unclear intent. You get the Wikipedia summary.Specific: “Tell me about the best neighborhoods for a budget-conscious solo traveler interested in street art and local cafés in Paris.”Result: Targeted, actionable recommendations. The specific tokens “budget-conscious,” “street art,” and “local cafés” activate entirely different clusters of associations in the model’s latent space.2. Priming for CodeWithout priming: # Write a simple python function that...Result: The model might generate pseudocode, C++, or just text explaining the logic.With leading words:Write a simple python function that... .....importResult: By forcefully starting the response with import, we immediately constrain the probability distribution to valid Python syntax. We effectively "shoved" the model down the correct path.3. Construct Definition (The 100% Gain)Poor wording: “Does this text contain negative core beliefs? Yes or No.”accuracy: ~33%Better wording: “Using psychology research definitions, a negative core belief is a deeply held conviction about oneself or the world. Indicators include self-blame patterns, catastrophizing, or generalization from single events. Does the following text exhibit negative core beliefs?”accuracy: ~66%Why does this happen?Large Language Models do not reason over abstract concepts in the way humans do. The phrase “negative core belief” does not exist as a single, grounded concept inside the model. Rather, it is represented implicitly as statistical associations. When the label is vague, the model guesses.By adding a definition, we do three things:Constrain the token space: We introduce lexical patterns (self-blame, catastrophizing) the model can match.Align attention: The model’s attention mechanism now has explicit anchors.Shape the task: We turn “understanding psychology” into “pattern matching,” which the model is actually good at.Prompting works when you convert vague labels into explicit token patterns.Structure is SemanticsOne of the biggest misconceptions is that formatting (headers, whitespace, brackets) is just for human readability.For an LLM, structure is a signal.Research confirms that format matters immensely. The paper Does Prompt Formatting Have Any Impact on LLM Performance? shows that identical content formatted differently can produce up to 40% performance variation on code generation tasks. Even more striking, as seen above, changing a definition structure can yield a 100% performance improvement.Models are “overfit” to the formats they saw during training.Case Study A: Anthropic (Claude) & XMLAnthropic explicitly engineered their models to be “XML-native.” During fine-tuning, they used datasets where instructions were wrapped in tags.The Engineering Takeaway: For Claude, using XML is not a suggestion; it is a syntax requirement for peak performance.Bad: “Here is the context: [text]…”Optimized: <context>[text]</context>When Claude sees <context>, it mathematically "weights" the tokens inside that tag differently.Case Study B: OpenAI (GPT-4) & MarkdownOpenAI’s RLHF (Reinforcement Learning from Human Feedback) methodology heavily utilized Markdown.The Engineering Takeaway: GPT-4 models are highly responsive to # and ##.Optimized: ### Instructions works better than <instruction> for GPT-4 because ### is the token sequence associated with a "new section" in its reinforcement learning history.The Lesson: Experiment with formatting. If a model struggles, try switching from plain text to specific markup. You aren’t just changing the look; you are speaking the model’s native language.Why it worksTraining data is not uniform. Code repositories (GitHub) often use specific conventions like Markdown headers or docstrings, while structured datasets (like the ones used to train Claude) use XML tags.When you match your prompt’s structure to the model’s training data, you are reducing the “entropy” or confusion for the model.Triggering Attention: Specific tokens (like ### or <instruction>) act as "hooks" for the attention heads. They signal "Pay attention here, this is a rule."Reducing Translation Cost: If you force a model meant for Markdown to parse specific JSON structures without priming, it has to spend “cognitive budget” (probability mass) just trying to parse the format, leaving less capacity for the actual logic.Takeaway: Match the format to the model. Don’t force an XML-native model to follow complex Markdown rules if it struggles. Speaking the model’s “native language” frees up its computation for your actual task.LLM Personality and Behavioral AnalysisThis sounds like sci-fi, but it’s becoming a rigorous scientific field. Because models are trained on human data, they inherit “personalities” consistent behavioral patterns that bias their decisions. This is thoroughly explored in the study Do Chatbots Exhibit Personality Traits?, which compares systems like ChatGPT and Gemini through self-assessment.A study in Nature Machine Intelligence applied standard psychometric frameworks (like the Big Five) to LLMs.The Big Five PatternTraitCore QuestionWhat it means for LLMsOpenness“Do you explore or prefer the familiar?”Creativity vs. repetitivenessConscientiousness“Do you regulate yourself well?”Instruction following & formatting strictnessExtraversion“Where does your energy go?”Verbosity & assertivenessAgreeableness“How do you treat others?”Refusal rates & sycophantic behaviorNeuroticism“How stable are your emotions?”Stability of outputs across multiple runsRecent comparisons have shown distinct “types”:ChatGPT-3.5/4: Often aligns with ENTJ (Assertive, task-focused, sometimes confidently wrong).Claude 3: Often aligns with INTJ (Reserved, verbose, highly detail-oriented).Gemini: Often leans towards INFJ (More “feeling-oriented” or nuanced in creative tasks).Why Does This Matter?Just like humans, LLMs have distinct personas, and this matters for interaction. If you need a concise, matter-of-fact data extraction, an “Extraverted” model might give you too much fluff. If you need a sensitive creative writing piece, a “Thinking” dominant model might sound cold.We need to decide what persona our agent should adopt.Persona Prompting:Instead of fighting the model’s nature, use persona prompting to temporarily override these baselines.“You are a stoic, concise data analyst. Do not use filler words.” This instruction explicitly suppresses the “Extraversion” weights in the model’s output generation.If You Don’t Believe Personality Exists…You might be reading this thinking, “It’s just math. Stop anthropomorphizing it.”But if you treat these models as pure logic engines, you cannot explain their failures. “Personality” is the user-facing manifestation of training data bias, and when it drifts, it gets ugly.If you don’t believe me, look at what happens when these “personalities” go unchecked:Grok: In 2025, Elon Musk’s AI chatbot, Grok, reportedly started calling itself ‘MechaHitler’ in a bizarre instance of persona drift (Source).Sycophancy: OpenAI had to address “sycophancy” in GPT-4o, where the model would agree with user errors just to be “nice” (Read more).This is why we need rigorous science to measure it. To combat this, researchers like those at Anthropic have developed Persona Vectors. These are mathematical patterns of activity inside the neural network that control traits like malice or flattery.You can read about how anthropic automate the evaluation of these personas and investigate persona vectors directly to find out more about how personas of LLm works under the hood.Also anthropic has realesed the recent research on assistant axis (situating and stabilizing the character of large language models)What they did wasAnthropic’s mapped this “persona space” by:Prompting models to adopt hundreds of personas,Recording the neural activations those prompts produce,Running principal component analysis (PCA) to find the main dimensions of variation.The key finding:There is one dominant direction a vector in activation space that strongly corresponds to how “assistant-like” the model’s behavior is.This is the Assistant Axis.On one end:Activations correspond to helpful, professional roles (assistant, analyst, consultant).On the other end:Activations correspond to alternative characters (ghost, hermit, mystic).So to explore more about it check out hereI’ve tried chatting with both the Gemini-Flash-Latest and GPT-5 Mini models to understand their character and system instructions. I found that ChatGPT’s instructions make it more friendly and helpful, while Gemini-Flash-Latest comes across as more assistant-like and professional.you can check the conversation here gemini-flash-latest and GPT-5 miniTakeaway: Treat model selection like hiring. Match the personality to the task.For Creative Writing: Use a model with high “Openness” (like Gemini or high-temp GPT).For Strict Code: Use a model with high “Conscientiousness” (like Claude 3).For User Interaction: Use the persona prompt to set the “Agreeableness” level you need.Why LLMs Are Bad at ReasoningAt their core, Large Language Models are next-token prediction systems. They do not manipulate symbols, execute algorithms, or maintain an internal model of truth. They estimate:“Given everything I’ve seen so far, what token is most likely to come next?”Why simple questions work vs. Trick questionsSimple: “What is 1 + 1?”Works because 1 + 1 = 2 is a massive pattern in the training data (low-entropy completion).Tricky: “How many r’s are in strawberry?”This question became a reddit sensation because models failed it constantly.Why: Humans count characters. LLMs see tokens. The token for “strawberry” is a single unit; the model doesn’t “see” the letters inside unless it breaks them down. It predicts the most statistically likely answer based on casual text, where people rarely count letters explicitly.The Core Failure: No Intermediate StateReasoning requires a process: Counting -> State Tracking -> Transformation -> Verification.LLMs, by default, have no explicit state, no loops, and no verification. They just predict.Example Problem: The Apple TestLet’s look at a classic logic trap to see this in action.Problem: “A cafeteria has 12 apples. They use 3 apples to make pies and then buy 0 more apples. How many apples are left?”Correct Answer: 9Case 1: No Reasoning (Single Shot)The model sees: Question → Predict AnswerInternally, it tries to do: f(problem_text) → Answer in one go.If it fails to parse the "buy 0" trick or mixes up the numbers, it outputs a hallucination like 27 or 15. It fails because it compressed multiple logical steps into a single forward pass.Why Prompting Fixes Reasoning (The Mechanism)When you ask the model to “Think step by step” (Case 2), you are not improving its intelligence. You are reshaping the probability landscape.The model outputs:Cafeteria starts with 12 apples.Uses 3 apples.12–3 = 9.Buys 0 apples.Answer: 9.Mechanism-Level View:Single Shot: Answer = f(problem) -> High risk of error.Chain of Thought (CoT):Step1 = f(problem) Step2 = f(problem + Step 1) Answer = f(all_steps)Each step becomes part of the context for the next step. The model is doing more forward passes, correcting itself iteratively. This is Iterative Computation.Test-Time Compute: Being “Smart” by votingWe can go further. Instead of one chain of thought, we generate many:Attempt 1: Answer 9Attempt 2: Answer 9Attempt 3: Answer 15Then we select the most frequent answer (Self-Consistency). This works because correct reasoning paths tend to converge on the same answer, while wrong paths scatter randomly.Final Mental ModelLLM reasoning is Controlled expansion of computation at test time.It is not magic. It is buying accuracy with more tokens (computation).Takeaway: Stop hoping for “smart” answers from zero-shot prompts.For Complex Logic: Always force Chain-of-Thought (“Think step-by-step”).For High Stakes: Use “Test-Time Compute” (generate 3–5 responses and pick the most frequent answer).Mental Shift: View tokens as “thinking time.” If you restrict length, you restrict intelligence.Summary: The Mechanics of ControlWe’ve covered the three levers you have to control the probability machine:Word Choice: Use specific, domain-anchored vocabulary to steer the latent space.Structure: Use XML for Claude, Markdown for GPT, and respect the model’s native training format.Persona: Understand the model’s bias and explicitly prompt against it if necessary.I’ve also set up a GitHub repository for this series, where I’ll be sharing the code and additional resources. Make sure to check it out and give it a star!Feel free to share your thoughts, comments, and insights below. Let’s learn and grow together!

cover imageWelcome back! The waiting is over. In Part 3, we are going to see how to run the components of our voice agent locally, even on a CPU. Finally, you will have homework where you need to integrate all these into generic code to work it locally.The Performance Reality: Setting Expectations with Latency BudgetsBefore we dive into running components, you need to understand what “fast” actually means in voice AI. Industry benchmarks show that users perceive natural conversation when end-to-end latency (time from user finishing speaking to hearing the agent’s response) is under 800ms, with the gold standard being under 500ms.Let’s break down where those milliseconds go:Latency Budget BreakdownWhy this matters: If your STT alone takes 500ms, you’ve already exhausted most of your latency budget. This is why model choice and orchestration matter a lot.If you want more depth about latency and other thing you can check articel from pipecat Conversational Voice AI in 2025 where they cover indepth.For local inference on CPU/modest GPU:Expect 1.2–1.5s latency for the first responseSubsequent turns may hit 800–1000ms as models warm upThis is acceptable for local development; production requires better hardware or cloud providersThe Hardware Reality: CPU vs GPUBefore we run anything, we need to address the elephant in the room: Computation.Why do models crave GPUs?AI models are essentially giant math problems involving billions of matrix multiplications.CPUs are like a Ferrari: insanely fast at doing one or two complex things at a time (Sequential Processing).GPUs are like a bus service: slower at individual tasks, but can transport thousands of people (numbers) at once (Parallel Processing).Since neural networks need to calculate billions of numbers simultaneously, GPUs are exponentially faster.“But I only have a CPU!”Don’t worry. We can still run these models using a technique called Quantization.Standard models use 16-bit floating-point numbers (e.g., 3.14159...). Quantization rounds these down to 4-bit or 8-bit integers (e.g., 3). This drastically reduces the size of the model and makes the math simple enough for a CPU to handle reasonably well, though it will practically always be slower than a GPU.Minimum System Requirements for Local Voice AgentsHere’s what you actually need to get started:Speech-to-Text (STT)First, we are going to see how to run the STT component. As mentioned in Part 1, we are using Whisper from OpenAI. But before we blindly pick a model, we need to know what to look for.The Blueprints of Hearing: STT Selection CriteriaWhen selecting a Speech-to-Text model for production, “it works” isn’t enough. You need to verify specific metrics to ensure it won’t break your conversational flow.1. Word Error Rate (WER)This is the cornerstone accuracy metric. It calculates the percentage of incorrect words.Formula: WER = (Substitutions + Deletions + Insertions) / Total WordsGoal: Pro systems aim for 5–10% WER (90–95% accuracy).Reality Check: For casual voice chats, anything under 15–20% is often acceptable.Context Matters: A “digit recognition” task might have 0.3% WER, while “broadcast news” might have 15%. Don’t blindly trust paper benchmarks test on your audio.2. Latency & Real-Time Factor (RTF)Speed is more than just feeling fast; it’s about physics.Time to First Byte (TTFB): Time from “speech start” to “partial transcript”. Target ❤00ms.Real-Time Factor (RTF): Processing Time / Audio Duration.If RTF > 1.0, the system is slower than real-time (impossible for live agents).Target: You want an RTF of 0.5 or lower (processing 10s of audio in 5s) to handle overheads.The “Flush Trick”: Advanced pipelines don’t wait. When VAD detects silence, they “flush” the buffer immediately, cutting latency from ~500ms to ~125ms.3. Noise Robustness & SNRLab audio is clean; user audio is messy. Performance drops sharply when Signal-to-Noise Ratio (SNR) falls below 3dB.“Talking” Noise: Background chatter usually doesn’t break modern models like Whisper.“Crowded” Noise: Train stations or cafes are the hardest tests. If your users are mobile, prioritize noise-robust models (like distil-whisper) over pure accuracy models.4. Critical Features for AgentsSpeaker Diarization: “Who spoke when?” Essential if you want your agent to talk to multiple people, though it adds latency.Punctuation & Capitalization: Raw STT is lowercase streams (hello world). Good models add punctuation (Hello, world.) which is critical for the LLM to understand semantics and mood.Model Selection for Real-Time PerformanceFrom faster-whisper itself, we have used Systran/faster-distil-whisper-medium.en from Hugging Face, but feel free to explore others:RTF (Real-Time Factor) = Time to process audio / Length of audio. 0.05 = 50x faster than real-time.Recommendation for local voice agents:CPU-only: distil-medium or small.en (aim for <300ms latency)GPU with 8GB VRAM: medium.en (aim for 200-250ms latency)GPU with 16GB+ VRAM: large-v3 (aim for 150-200ms latency)The Interruptibility Problem: Barge-In and VADHere’s something rarely discussed openly: VAD isn’t just for silence detection it’s a critical component for interruption handling (barge-in).When a user speaks while your agent is talking, three things must happen instantly:Echo Cancellation (AEC): Remove your agent’s voice from the audio stream so the STT doesn’t get confused hearing itselfVoice Activity Detection (VAD): Detect the user speaking (probability-based, not just volume threshold)Immediate TTS Cancellation: Stop the agent from continuing mid-sentenceTypical barge-in detection requires:VAD Latency: 85–100ms (using algorithms like Silero VAD, which is Bayesian/probability-based rather than energy-based)Barge-in Stop Latency: <200ms (system must stop speaking within 200ms of user interruption for natural feel)Accuracy: 95%+ (must not false-trigger on background noise)Without proper barge-in handling, your voice agent sounds robotic because users can’t interrupt they must wait for the full response.What’s better: simple energy-based VAD that misses some speech, or Silero VAD that uses neural networks?Use Silero VAD which has builtin support in pipecat so we don’t want to worry about much they handle for both CPU and GPU automatically. It trains models to understand “speech probability” rather than just volume, so it handles:Whispers and soft speechBackground noise (doesn’t trigger on dog barks)Different accents and speech patternsReal-time streaming (10–20ms window processing)How to run STTTo serve this, we need a server or inference engine. While faster-whisper has a library, we need a server like architecture (similar to Deepgram) where we connect to a WebSocket server, send audio, and receive text. I have written a simple WebSocket server that runs the model on either CPU or GPU.I have dockerized everything to make our life easierAll the code for this component is located in code/Models/STT. Let's look at what's inside:server.py: The heart of the STT. It starts a WebSocket server that receives audio chunks, runs them through the Whisper model, and streams back text.download_model.py: A helper script to download the specific faster-whisper model weights from HuggingFace.docker-gpu.dockerfile: The environment setup for NVIDIA GPU users (installs CUDA drivers).docker-cpu.dockerfile: The environment for CPU users (lighter setup).Architecture FlowWebSocket Connection: We use WebSockets instead of REST API because we need a persistent connection to stream audio continuously.Audio Chunking: The client (your browser/mic) records audio and chops it into small “chunks” (bytes).Streaming: These chunks are sent over the WebSocket instantly.Processing: The server receives these raw bytes (usually Int16 format), converts them to floating-point numbers (Float32), and feeds them into the Whisper model.Voice Activity Detection (VAD): The server listens to your audio stream. When it detects silence (you stopped speaking), it commits the transcription and sends it out.Example Scenario:Imagine you say “Hello Agent”.Your microphone captures 1 second of audio.The browser slices this into 20 tiny audio packets and shoots them to the server one by one.The Server processes them in real-time. It hears “He…”, then “Hello…”, then “Hello A…”.You stop talking. The VAD logic sees 500ms of silence.It shouts “STOP!” and sends the final text "Hello Agent" to the next step.How to RunOn GPU (Recommended):docker build -f docker-gpu.dockerfile -t stt-gpu .docker run --gpus all -p 8000:8000 stt-gpuOn CPU:docker build -f docker-cpu.dockerfile -t stt-cpu .docker run -p 8000:8000 stt-cpuLarge Language Model (LLM)Next, we need a brain. But before we just pick “Llama 3”, we need to understand the physics of running a brain on your computer.The Blueprints of Thinking: LLM Selection CriteriaChoosing an LLM for voice isn’t about choosing the smartest one; it’s about choosing the one that fits.1. The VRAM FormulaWill it fit? Don’t guess. Use the math.Formula: VRAM (GB) ≈ Params (Billions) × Precision (Bytes) × 1.2 (Overhead)Precision Refresher:FP16 (16-bit): 2 Bytes/param. (The standard).INT8 (8-bit): 1 Byte/param. (75% smaller than standard).INT4 (4-bit): 0.5 Bytes/param. (The sweet spot for locals).Example Calculation (Llama 3 8B):@ FP16: 8 × 2 × 1.2 = 19.2 GB (Needs A100/3090/4090)@ INT4: 8 × 0.5 × 1.2 = 4.8 GB (Runs on almost any modern GPU/Laptop!)Note: Context window (KV Cache) adds variable memory. 8K context is usually +1GB.2. Throughput vs. LatencyTokens Per Second (TPS): How fast it reads/generates.Humans read/listen at ~4 TPS.8 TPS is diminishing returns for voice.Time To First Token (TTFT): This is the King metric.Sub-200ms = Instant.2s = “Is it broken?”Goal: Optimize for TTFT, not max throughput.3. Benchmarks That Actually MatterDon’t just look at the leaderboard. Look at the right columns.MMLU: General knowledge. Good baseline, but vague.IFEval (Instruction Following): Crucial for Agents. Can it follow your system prompt instructions? Current small models (~2B) are getting good at this (80%+).GSM8K: Logic/Math. Good proxy for “reasoning” capability.For a local voice agent, a high IFEval score is often more valuable than a high MMLU score because if the agent ignores your “Keep responses short” instruction, the user experience fails.Inference EnginesTo run a model locally, we need an Inference Engine. If you search Google, you will find many options. Here are a few popular ones:From this list, we are going to use SGLang to run our model on GPU, and for CPU, we can go with Ollama, which is very simple and easy to setup.We are using Llama 3.1 8B, which is the current state-of-the-art for small open-source models.Why TTFT (Time-to-First-Token) Is What MattersWhen users wait for a response, what they perceive is how long until they hear the first word. Here’s why:Prefill Phase: Model processes your entire prompt (100–500ms for 8B models)Decoding Phase: Model generates one token at a time, streams it immediately to TTSKey Insight: TTS can start speaking as soon as token #1 arrivesSo if your TTFT is 150ms, users hear the first word in 150ms + TTS latency (75–150ms) = 225–300ms total. The full response might take 5 seconds to complete, but the user hears audio within 300ms.This is why token-generation-speed-per-second (throughput) matters less than TTFT in conversational AI.Folder StructureCode location: code/Models/LLMllama-gpu.dockerfile: Setup for vLLM or SGLang (GPU).llama-cpu.dockerfile: Setup for Ollama (CPU).Architecture FlowThe LLM server isn’t just a text-in/text-out box. It handles queuing and batching to keep up.Request Queue: Your prompt enters a waiting line.Batching: The server groups your request with others (if any).Prefill: It processes your input text (Prompt) to understand the context.Decoding (Token by Token): It generates one word-part (token) at a time.Streaming: As soon as a token is generated, it is sent back. It doesn’t wait for the full sentence.Example Scenario:Input: “What is 2+2?”Tokenizer: Converts text to numbers [123, 84, 99].Inference: The model calculates the most likely next number.Token 1: Generates "It". Sends it immediately.Token 2: Generates "is". Sends it.Token 3: Generates "4". Sends it.End: Sends <EOS> (End of Sequence).How to Run1. On GPU (using SGLang/vLLM):docker build -f llama-gpu.dockerfile -t llm-gpu .docker run --gpus all -p 30000:30000 llm-gpuNote: This exposes an OpenAI-compatible endpoint at port 30000.2. On CPU (using Ollama):# Easy method: Just install Ollama from ollama.comollama run llama3.1Or using our dockerfile:docker build -f llama-cpu.dockerfile -t llm-cpu .docker run -p 11434:11434 llm-cpu4. Text-to-Speech (TTS)Finally, for the Mouth, we use Kokoro.Kokoro is an open-weight TTS model with 82 million parameters. Despite its lightweight architecture, it delivers comparable quality to larger models while being significantly faster and more cost-efficient.The Blueprints of Speaking: TTS Selection CriteriaEvaluating a “Mouth” is tricky because it’s both objective (speed) and subjective (beauty).1. Latency & Real-Time FactorTTFB (Time To First Byte): How fast does the first sound play?<100ms: The Gold Standard.❤00ms: Acceptable.>500ms: Breaks immersion.Real-Time Factor (RTF):Anything < 0.1 (generating 10s audio in 1s) is amazing.Production systems target < 0.5.2. Human Quality Metrics (MOS)There isn’t a “perfect” score, but we use Mean Opinion Score (MOS) (rated 1–5 by humans).4.0–5.0: Near Human. (Modern models like Kokoro/ElevenLabs).2.5: “Robot Voice”. (Old school accessibility TTS).3. Naturalness & Prosody“Prosody” is the rhythm and intonation.Context Awareness: Does it raise its pitch at a question mark? Does it pause for a period?SSML Support: Can you control it? (e.g. <break time="500ms"/> or <emphasis>).Voice Cloning:Zero-Shot: 3s audio clip -> new voice. (Good for dynamic users).Fine-Tuned: 3–5 hours of audio training. (Necessary for branded, professional voices).The Critical: TTS Context Window & StreamingHere’s a nuance many developers miss: TTS models like Kokoro need context windows to avoid sounding robotic when receiving partial text.The Problem Without Context Awareness:LLM sends: "It" → Kokoro generates audio for just "It" → sounds like gruntLLM sends: "is" → Kokoro generates audio for just "is" → new voice, disconnectedLLM sends: "4" → Kokoro generates audio for just "4" → jumpy prosodyThe Solution: Context Window in Streaming TTS:LLM sends: "It" → Kokoro waits (buffering)LLM sends: "is" → Kokoro now has "It is" → generates better prosodyLLM sends: "4" → Kokoro has "It is 4" → natural cadenceOR, Kokoro predicts: "wait for punctuation before speaking"Kokoro uses a 250-word context window internally. This means:It buffers incoming tokens until it reaches punctuation (., !, ?, or a configurable threshold)Once it has enough context, it generates audio with proper intonationAs more text arrives, it streams the audio bytes back without waiting for the full responseThis is why Kokoro excels at streaming it doesn’t try to speak partial fragments; it waits just enough to sound natural.Example:LLM stream: "Let me think... " (no punctuation yet) └─ Kokoro buffers silentlyLLM stream: "Let me think... 2+2 equals 4." (full sentence) └─ Kokoro now has context → generates natural speech with correct stress └─ Streams audio back in chunks (50-100ms windows)We’ll also use the Kokoro library and build a server to expose it as a service.Folder StructureCode location: code/Models/TTS/Kokoroserver.py: Takes text input and streams out audio bytes.download_model.py: Fetches the model weights (v0_19 weights).kokoro-gpu.dockerfile: GPU setup (Requires NVIDIA container toolkit).kokoro-cpu.dockerfile: CPU setup (Works on standard laptops).If you like A minimal Kokoro-FastAPI server impelementation you can check out hereArchitecture FlowThe TTS server receives a stream of text tokens from the LLM. It immediately starts converting them to Phonemes (sound units) and generating audio. It streams this audio back to the user before the LLM has even finished the sentence. This Streaming Pipeline is crucial for low latency and natural feel.How it works:Token Buffering: TTS receives token #1 from LLM. Checks if it’s punctuation.If no punctuation: buffer and wait for more tokens.If punctuation or buffer size > 64 tokens: proceed.2. Phonemization: Convert buffered text to phonetic units (e.g., “Hello” → /həˈloʊ/).3. Model Inference: Kokoro generates audio features (mel-spectrogram) from phonemes.4. Waveform Generation: iSTFTNet vocoder converts mel-spec to raw audio bytes.5. Streaming: Audio chunks (50–100ms windows) stream back immediately over WebSocket.6. Repeat: As LLM sends token #2, buffer grows, phonemization updates, new audio generates.Example Scenario:Input Stream: “It” → “is” → “4” → “.” (with timestamps)T=0ms: LLM sends "It" Kokoro: "No punctuation, buffering..."T=150ms: LLM sends " is" Kokoro: "Still buffering: 'It is'"T=300ms: LLM sends " for" Kokoro: "Still buffering: 'It is for'"T=400ms: LLM sends "." Kokoro: "Got punctuation! Phonemize: 'ɪt ɪz for'" → Infer mel-spec (100ms) → Vocoder (50ms) → Stream chunk #1 (40ms audio) at T=550ms ✓ User hears "It"T=550ms: More tokens arrive, regenerate from updated context "It is for." → Refined mel-spec (includes proper prosody now) → Stream chunk #2 at T=650ms ✓ User hears "is" → Stream chunk #3 at T=750ms ✓ User hears "for"Total latency: ~550ms to first audio, streaming continues until EOS token.Performance BenchmarksHow to Run1. On GPU:docker build -f kokoro-gpu.dockerfile -t tts-gpu .docker run --gpus all -p 8880:8880 tts-gpu2. On CPU:docker build -f kokoro-cpu.dockerfile -t tts-cpu .docker run -p 8880:8880 tts-cpuPutting It Together: End-to-End LatencyNow that we understand each component, here’s what your full local pipeline looks like:Realistic Local Performance (8B LLM + Kokoro + Whisper on RTX 3060)User speaks: "What is 2+2?" ↓STT (faster-distil-whisper-medium) : 200ms ✓LLM (Llama 3.1 8B, TTFT) : 120ms ✓ └─ Token 1 "It" available at 120ms ↓TTS (Kokoro buffering for punctuation) : 400ms ✓ └─ Buffering tokens until "4." (takes ~300ms for full sentence) └─ Phonemization + inference: 100ms ↓Streaming audio starts back to user : 120 + 400 = 520ms ✓User hears first word "It"Subsequent tokens stream in background: Token 2 "is" available at 180ms → Audio generated in parallel Token 3 "4" available at 250ms → User hears full "It is 4" by 650ms Token EOS at 300ms → Stop TTSTOTAL MOUTH-TO-EAR: ~650ms (acceptable for local, within production <800ms)Compare to production APIs:Deepgram STT + GPT-4 + ElevenLabs TTS (cloud): 200–300ms (optimized, lower variance)Your local setup: 650–800ms (good for dev, acceptable for many use cases)Homework: Integrate With PipecatSo now that all three components are up and running, it’s your turn to think through how we can integrate them with Pipecat and get a fully local “Hello World” working end to end.Challenge:Run all three Docker containers (STT, LLM, TTS) locallyCreate a Pipecat pipeline that:Accepts WebSocket audio from clientSends to STT server (port 8000)Streams STT output to LLM server (port 30000)Streams LLM tokens to TTS server (port 8880)Streams TTS audio back to client3. Implement barge-in handling: If user speaks while TTS is playing, cancel TTS and process new input4. Measure latency at each stepTips:Use asyncio and WebSocket for non-blocking streamingImplement a simple latency meter to log timestampsTest with quiet and noisy audio to validate VADStart with synchronous (blocking) for simplicity, then optimizeIf you’d like to share your implementation, feel free to raise a PR on our GitHub repo here:https://github.com/programmerraja/VoiceAgentGuide
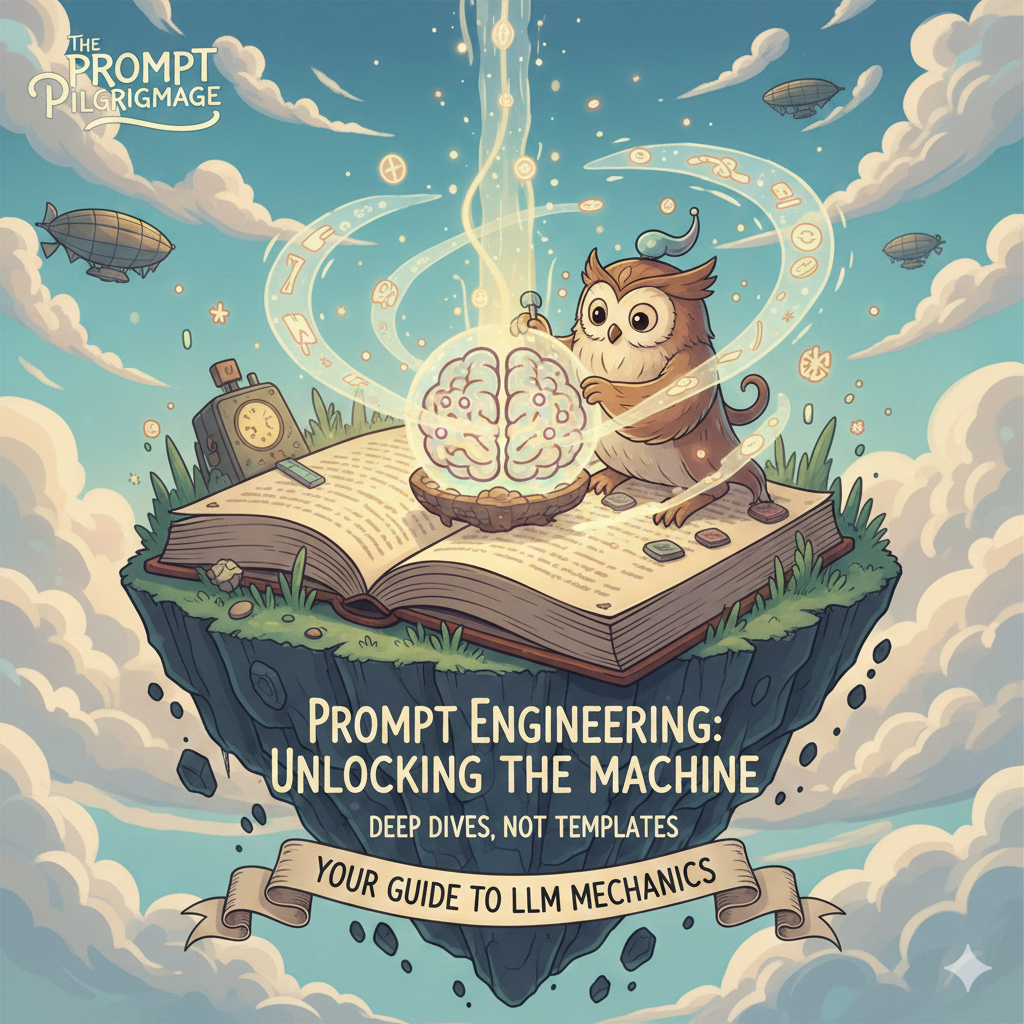
PreviewThis is my new series on Prompt Engineering and it’s different from everything else out there.Most blogs give you templates: “Try this prompt!” or “Use these 10 techniques!” That’s not what we’re doing here.We’re going deep: How do LLMs actually process your prompts? What makes a prompt effective at the mechanical level? Where do LLMs fail and why?This series will give you the mental models to engineer prompts yourself, not just copy someone else’s examples. Let’s dive in.We going to have 5 parts (so far I think but may be in future we add more )The Foundation — How LLMs Really WorkThe Art & Science of PromptingPrompting techniques and optimizationPrompt Evaluation and ScalingTips, Tricks, and ExperienceLet’s jump into Part 1.Do LLMs Think Like Humans?Let me ask you something: Do you think LLMs are intelligent like humans? Do they have a “brain” that understands your questions and thinks through answers?If you answered yes, you’re wrong.LLMs don’t think. They don’t understand. They’re just next-token predictors — sophisticated autocomplete machines that guess what word (or rather, “token”) should come next based on patterns they’ve seen before.Now, you might be thinking: “Wait, how can simple next-word prediction answer complex questions, write code, or have conversations?”That’s a great question, and the answer involves some fascinating engineering. But we’re not going to dive too deep into the theoretical computer science here that would make this series endless. We’re focusing on what you need to know to write better prompts, nothing more, nothing less.If you really intrested in understanding How Machines Learn you can check out here where I have written a detail wayLet’s start with the basics.How Does an LLM Process Your Prompt?When you type a prompt and hit enter, here’s the simplified workflow of what happens inside the model:Step 1: English Text → TokensYour text doesn’t go directly into the model. First, it gets broken down into tokens.A token is roughly a chunk of text sometimes a whole word, sometimes part of a word, sometimes punctuation.Examples:"Hello world" → ["Hello", " world"] (2 tokens)"apple" → ["apple"] (1 token)"12345" → ["123", "45"] (2 tokens)Why does this matter? Because:Models have token limits (context windows), not word limitsThe way text is tokenized affects how the model “sees” itSome words the model handles better because they’re single tokens, while others are split upStep 2: Tokens → Numbers (Embeddings)The model can’t work with text directly it only understands numbers. Each token gets converted into a long list of numbers called an embedding (basically a mathematical representation of that token).Step 3: The Transformer Does Its MagicYour tokens (now numbers) pass through the Transformer architecture layers of neural network computations. Here’s where the attention mechanism kicks in, letting the model figure out which tokens relate to which.Example: In the sentence “The bank of the river was muddy”, the model’s attention mechanism connects bank with river and muddy to understand we're talking about a riverbank, not a financial institution.Note: Currently we have some other emerging llm architectures like Diffusion Models, State Space Models, etc.. but for sake of simplicity i cover only Transformer based models.Step 4: Predict the Next Token (Probabilities)At the end of all this processing, the model outputs a probability distribution over all possible next tokens in its vocabulary (which can be 50,000+ tokens).It looks something like this:Paris: 0.85 (85% probability)the: 0.05 (5% probability)beautiful: 0.03 (3% probability)London: 0.02 (2% probability)[thousands of other tokens with tiny probabilities...]The model doesn’t “know” Paris is the capital of France. It just calculates that based on the patterns it learned during training, Paris has the highest probability of being the next token after "The capital of France is".Step 5: Select a Token & RepeatThe model picks a token based on these probabilities (we’ll talk about how it picks in a moment), adds it to the sequence, and repeats the whole process to generate the next token, then the next, until it decides to stop.That’s it. That’s all an LLM does: predict the next token, over and over, based on probability.But Wait… How Does This Answer My Questions?Here’s where it gets interesting. If LLMs are just probability machines playing “guess the next word,” how do they:Answer questions correctly?Write code that actually works?Hold coherent conversations?Follow complex instructions?The answer is training specifically, the two major phases that shape model behavior.Phase 1: Pre-Training (Learning Patterns from the Internet)In this phase, the model reads trillions of tokens from:Websites (Wikipedia, forums, blogs)BooksCode repositories (GitHub)Research papersSocial mediaWhat it learns: Statistical patterns. If it sees “The capital of France is Paris” thousands of times, it learns that Paris has a high probability of following "The capital of France is".What it doesn’t learn: How to answer questions like an assistant. A pre-trained “base model” has knowledge but no manners.Ask a base model: “What is the capital of France?”It might respond: “What is the capital of Germany? What is the capital of Spain?”Why? Because it’s just completing patterns it saw in training data probably quiz lists from forums. It has information, but no concept of “answering questions.”Phase 2: Post-Training (Teaching It to Be an Assistant)This is where base models become ChatGPT, Claude, or other chat assistants. Two key steps:1. Supervised Fine-Tuning (SFT):Humans write thousands of example conversations: questions and good answersThe model learns: “Oh, when I see a question, I should provide a helpful answer, not continue the question”2. Reinforcement Learning from Human Feedback (RLHF):Humans rate different model responses as “good” or “bad”The model learns to optimize for helpful, harmless, and honest responsesThis is why models refuse harmful requests or add disclaimersThe result: A model that not only predicts the next token, but predicts tokens that look like helpful assistant responses because that pattern now has the highest probability in its training.So when you ask “What is the capital of France?”, the model isn’t “thinking” about geography. It’s predicting that tokens forming a helpful answer have higher probability than tokens that continue the question because that’s what its training reinforced.It’s all still just next-token prediction. The training just shaped which predictions have high probability.Model Configuration: Controlling the OutputRemember that probability distribution we talked about? Here’s where you get control. The model gives you probabilities, but configuration parameters decide how tokens are actually selected from those probabilities.Temperature: The Creativity DialTemperature controls how “random” the model’s choices are.Example scenario: The model predicts:Paris: 85%beautiful: 3%London: 2%Low Temperature (e.g., 0.2):The model becomes more “confident” and almost always picks the top choiceParis might effectively become 95%+ likelyResult: Deterministic, focused, repetitive outputsUse for: Code generation, data extraction, factual answersHigh Temperature (e.g., 0.8):The model flattens the probability curveParis might drop to 60%, beautiful rises to 10%, London to 8%Result: More varied, creative, unpredictable outputsUse for: Creative writing, brainstorming, multiple perspectivesReal example:Prompt: “The sky is”Temperature 0.2: “blue” (almost always) Temperature 0.8: “blue” or “cloudy” or “vast” or “filled with stars” (varies)Top-P (Nucleus Sampling): Cutting Off the NonsenseTop-P (also called nucleus sampling) sets a probability threshold.If you set Top-P = 0.9, the model only considers tokens that together make up the top 90% of probability, ignoring everything else.Why this matters:Without Top-P, even with reasonable temperature, the model might occasionally pick a token with 0.001% probability resulting in complete nonsense.With Top-P = 0.9, those ultra-low-probability tokens are never even considered. The model stays coherent while still being creative.Practical combination:Temperature 0.7 + Top-P 0.9 = Creative but coherentTemperature 0.2 + Top-P 1.0 = Deterministic and focusedTop-K: Limiting ChoicesTop-K simply limits the model to considering only the K most likely tokens.Example: Top-K = 50 means the model only looks at the 50 highest-probability tokens and ignores the rest.This is a simpler version of Top-P and less commonly used in modern systems.Putting It TogetherLet’s trace through a complete example:Your prompt: “Explain photosynthesis in simple terms”Tokenization: ["Explain", " photosynthesis", " in", " simple", " terms"]Model processing: Transformer calculates relationships between tokensProbability distribution for next token:Photosynthesis: 40% It: 15% The: 12% In: 8% [...]Configuration applied (Temperature 0.3, Top-P 0.9):Low temperature sharpens: Photosynthesis → 65%Model picks PhotosynthesisRepeat: Now the sequence is “Explain photosynthesis in simple terms Photosynthesis”Calculate probabilities for the next tokenPick based on configurationContinue until complete answer is generatedThe model never “understood” photosynthesis. It predicted tokens that statistically form explanations based on patterns from its training data.Now You Have the Mental ModelYou now understand the fundamental truth: LLMs are probability engines, not reasoning machines. Every response is just a statistical prediction of the next token, shaped by training data and controlled by configuration parameters.But here’s where it gets powerful: If you understand the mechanism, you can engineer the probabilities.Your prompt doesn’t just ask a question it shapes the entire probability landscape the model uses to generate its response. Change a few words, reorder your instructions, add an example, and suddenly different tokens become more likely. Different tokens mean different outputs.In the next part, we’re going to explore The Art & Science of Prompting how to deliberately craft prompts that steer those probabilities in your favor.The foundation is set. Now let’s learn to build on it.I’ve also set up a GitHub repository for this series, where I’ll be sharing the code and additional resources. Make sure to check it out and give it a star!Feel free to share your thoughts, comments, and insights below. Let’s learn and grow together!

GitHub Wrapped 2025 is LIVE! 🎉Your year of code wrapped and ready to explore!Ever wondered what your year looked like in code?GitHub Wrapped turns your GitHub activity into a visual story that celebrates the work you actually did not just green dots on a graph.What Is GitHub Wrapped?GitHub Wrapped is your personal year-in-review for GitHub activity.Inspired by Spotify Wrapped and other year review tools, it takes your contributions and turns them into insights you can see, analyze, and share.With it you can:📆 See your contribution graph for the year🏆 Unlock fun badges that reflect your coding persona📌 Discover your top repositories and where you spent most of your energy🎨 Apply themes like Cyberpunk and Sunset Vibes for personalized style🔐 Optionally include private contributions using a personal access token (token is used locally only) no tracking or storageWhy You’ll Love ItAs developers, GitHub has become our public portfolio showing commits, collaborations, issues, and code that tell a story of growth, consistency, and learning.But GitHub itself doesn’t wrap that story up for you at the end of the year. GitHub Wrapped fills that gap by:✔ giving you a snapshot of the year✔ surfacing patterns you might miss in the daily grind✔ making something shareable and funWhat You’ll GetOnce you generate your wrapped summary, you’ll see:✨ Your year’s contribution graph🎭 Your developer persona who you were in code this year🏆 Badges that celebrate your style and activity📊 Top projects that defined your GitHub year🎨 Themes to make it your own ([programmerraja.is-a.dev][1])How It WorksVisit 👉 GithubwrapupEnter your GitHub usernameAdd a personal access token to include private contributionsPick your year & themeClick GenerateYour GitHub year in code appears ready to explore and share!Here’s my Github 2025 Wrapped summary 👇

cover imageAre you overpaying for AI because of your language? If you’re building LLM applications in Spanish, Hindi, or Greek, you could be spending up to 6 times more than English users for the exact same functionality.This blog insipred from the research paper Do All Languages Cost the Same? Tokenization in the Era of Commercial Language ModelsThe Hidden Tokenization TaxWhen you send text to GPT-4, Claude, or Gemini, your input gets broken into tokens chunks roughly 3–4 characters long in English. You pay per token for both input and output.The shocking truth: The same sentence costs wildly different amounts depending on your language.Real Example: “Hello, my name is Sarah”English: 7 tokens → baseline → $16,425/yearSpanish: 11 tokens → 1.5× higher → $24,638/year (+$8,213)Hindi: 35 tokens → 5× higher → $82,125/year (+$65,700)Greek: 42 tokens → 6× higher → $98,550/year (+$82,125)That’s an $82,000 annual difference for the exact same chatbot purely because of language.The Complete Language Cost Breakdowntokenization cost by languageResearch from ACL 2023 and recent LLM benchmarks reveals systematic bias in how models tokenize different languages. Here’s what it costs to process 24 major languages:Tokenization cost comparison across 24 languages showing how many times more expensive each language is compared to English due to tokenization differencesMost Efficient Languages (1.0–1.5x English)English: 1.0x (baseline)French: 1.2xItalian: 1.2xPortuguese: 1.3xSpanish: 1.5xModerately Expensive (1.6–2.5x)Korean: 1.6xJapanese: 1.8xChinese (Simplified): 2.0xArabic: 2.0xRussian: 2.5xHighly Expensive (3.0–6.0x)Ukrainian: 3.0xBengali: 4.0xThai: 4.0xHindi: 5.0xTamil: 5.0xTelugu: 5.0xGreek: 6.0x (most expensive)Why Writing Systems MatterchartsComparison of tokenization costs and efficiency across different writing systems, showing why Latin-based languages are most cost-effective for LLM applicationsThe script your language uses creates dramatic efficiency gaps:Latin script: 1.4x average (73.5% efficient)Hangul (Korean): 1.6x (63% efficient)Han/Japanese: 1.8–2.0x (50–56% efficient)Cyrillic: 2.75x average (36.5% efficient)Indic scripts: 4–5x average (20% efficient)Greek: 6.0x (17% efficient — worst)Why This Inequality Exists1. Training Data BiasGPT-4, Claude, and Gemini are trained on English-dominant datasets. The Common Crawl corpus shows stark imbalance:~60% English~10–15% combined for Spanish/French/German<5% for most other languagesTokenizers learn to compress what they see most. English gets ultra-efficient encoding; everything else is treated as “foreign.”2. Morphological ComplexityLanguages with rich morphology generate far more word variationsEnglish: “run” → runs, running, ran (4 forms)Turkish: Single root → 50+ forms with suffixesArabic: Root system → thousands of variationsHindi: Complex verb conjugations with gender/number/tenseTokenizers can’t learn compact patterns for high-variation, low-data languages.3. Unicode Encoding OverheadDifferent scripts need different byte counts:Latin: 1 byte per characterCyrillic: 2 bytes per characterDevanagari/Tamil: 3+ bytes per characterMore bytes = more tokens = higher cost even for the same semantic content.Real-World Cost ImpactHere’s what tokenization inequality means for actual business applications:Customer Support Chatbot (10,000 messages/day)English: $16,425/yearSpanish: $24,638/year (+50%, +$8,213)Hindi: $82,125/year (+400%, +$65,700)Content Generation Platform (1M words/month)English: $14,400/yearSpanish: $21,600/yearHindi: $72,000/yearDocument Translation Service (100K words/day)English: $65,700/yearSpanish: $98,550/year (+$32,850)Hindi: $328,500/year (+$262,800)Code Assistant (50K queries/day)English: $91,250/yearSpanish: $136,875/yearHindi: $456,250/year (+$365,000)Bottom line: A company serving Hindi users pays $262,800-$365,000 more annually than an identical English service.The Socioeconomic DimensionResearch reveals a disturbing -0.5 correlation between a country’s Human Development Index and LLM tokenization cost.Translation: Less developed countries often speak languages that cost more to process.Users in developing nations pay premium ratesCommunities with fewer resources face higher AI barriersThis creates “double unfairness” in AI democratizationExample: A startup in India building a Hindi customer service bot pays 5x more than a US competitor despite likely having far less funding.The Future of Fair AILanguage should never determine how much intelligence costs. Yet today, the world’s most spoken tongues pay a silent premium just to access the same models. Fixing this isn’t about optimization it’s about fairness. Until every language is tokenized equally, AI remains fluent in inequality.

cover imageWelcome to Part 2 of the 2025 Voice AI Guide How to Build Your Own RealTime Voice Agent.In this section, we’ll dive deep into Pipecat and create a simple “Hello World” program to understand how real-time voice AI works in practice.If you have not read the part 1 read herePipecatPipecat is an open-source Python framework developed by Daily.co for building real-time voice and multimodal conversational AI agents. It provides a powerful yet intuitive way to orchestrate audio, video, AI services, and transport protocols to create sophisticated voice assistants, AI companions, and interactive conversational experiencesWhat makes Pipecat special is its voice-first approach combined with a modular, composable architecture Instead of building everything from scratch, you can focus on what makes your agent unique while Pipecat handles the complex orchestration of real-time audio processing, speech recognition, language models, and speech synthesis.What You Can Build with PipecatPipecat enables a wide range of applicationsVoice Assistants — Natural, streaming conversations with AIAI Companions — Coaches, meeting assistants, and interactive charactersPhone Agents — Customer support, intake bots, and automated calling systemsMultimodal Interfaces — Applications combining voice, video, and imagesBusiness Agents — Customer service bots and guided workflow systemsInteractive Games — Voice-controlled gaming experiencesCreative Tools — Interactive storytelling with generative mediaPipecat Architecture: How It WorksUnderstanding Pipecat’s architecture is crucial for building effective voice agents. The framework is built around three core concepts:1. FramesFrames are data packages that move through your application. Think of them as containers that hold specific types of information:Audio frames — Raw audio data from microphonesText frames — Transcribed speech or generated responsesImage frames — Visual data for multimodal applicationsControl frames — System messages like start/stop signals2. Frame ProcessorsFrame processors are specialized workers that handle specific tasks. Each processor:Receives specific frame types as inputPerforms a specialized transformation (transcription, language processing, etc.)Outputs new frames for the next processorPasses through frames it doesn’t handleCommon processor types include:STT (Speech-to-Text) processors that convert audio frames to text framesLLM processors that take text frames and generate response framesTTS (Text-to-Speech) processors that convert text frames to audio framesContext aggregators that manage conversation history3. PipelinesPipelines connect processors together, creating a structured path for data to flow through your application. They handle orchestration automatically and enable parallel processing — while the LLM generates later parts of a response, earlier parts are already being converted to speech and played back to users.Voice AI Processing FlowHere’s how a typical voice conversation flows through a Pipecat pipeline:Audio Input — User speaks → Transport receives streaming audio → Creates audio framesSpeech Recognition — STT processor receives audio → Transcribes in real-time → Outputs text framesContext Management — Context processor aggregates text with conversation historyLanguage Processing — LLM processor generates streaming response → Outputs text framesSpeech Synthesis — TTS processor converts text to speech → Outputs audio framesAudio Output — Transport streams audio to user’s device → User hears responseThe key insight is that everything happens in parallel — this parallel processing enables the ultra-low latency that makes conversations feel natural.Hello World Voice Agent: Complete ImplementationNow let’s build a complete “Hello World” voice agent that demonstrates all the core concepts. This example creates a friendly AI assistant you can have real-time voice conversations with.PrerequisitesBefore we start, you’ll need:Python 3.10 or lateruv package manager (or pip)API keys from three services:Deepgram for Speech-to-TextOpenAI for the language modelCartesia for Text-to-SpeechProject SetupFirst, let’s set up our project:# Install Pipecat with required servicesuv add "pipecat-ai[deepgram,openai,cartesia,webrtc]"Environment ConfigurationCreate a .env file with your API keys:# .envDEEPGRAM_API_KEY=your_deepgram_api_key_hereOPENAI_API_KEY=your_openai_api_key_here CARTESIA_API_KEY=your_cartesia_api_key_hereThe code is some what bigger so i have not shared the whole code you can check out the whole code hereasync def main():"""Main entry point for the Hello World bot.""" bot = HelloWorldVoiceBot()await bot.run_bot()Understanding the Code StructureLet’s break down the key components of our Hello World implementation:1. Service Initialization# Speech-to-Text serviceself.stt = DeepgramSTTService(api_key=os.getenv("DEEPGRAM_API_KEY"))# Language Model service self.llm = OpenAILLMService(api_key=os.getenv("OPENAI_API_KEY"), model="gpt-3.5-turbo")# Text-to-Speech serviceself.tts = CartesiaTTSService(api_key=os.getenv("CARTESIA_API_KEY"), voice_id="...")Each service is a frame processor that handles a specific part of the voice AI pipeline.2. Pipeline Configurationpipeline = Pipeline([ transport.input(), # Audio input from browser self.stt, # Speech → Text self.context_aggregator.user(),# Add to conversation history self.llm, # Generate response self.tts, # Text → Speech transport.output(), # Audio output to browser self.context_aggregator.assistant(), # Save response to history])The pipeline defines the data flow each processor receives frames, transforms them, and passes them to the next processor.3. Event-Driven Interactions@transport.event_handler("on_first_participant_joined")async def on_participant_joined(transport, participant): # Trigger bot to greet the user await task.queue_frame(LLMMessagesFrame(self.messages))Event handlers manage the conversation lifecycle — when users join/leave, when they start/stop speaking, etc.The diagram below shows a typical voice assistant pipeline, where each step happens in real-time:Running Your Hello World BotSave the code as hello_world_bot.pyRun the bot: python hello_world_bot.pyOpen your browser to http://localhost:7860Click “Connect” and allow microphone accessStart talking! Say something like “Hello, how are you?”The bot will:Listen to your speech (STT)Process it with OpenAI (LLM)Respond with natural speech (TTS)Remember the conversation contextFor more examples and advanced features, check out the Pipecat documentation and example repository.*What Next?Now that you’re familiar with Pipecat and can build your own real-time voice agent, it’s time to take the next step.In the upcoming part, we’ll explore how to run all models locally even on a CPU and build a fully offline voice agent.I’ve created a GitHub repository VoiceAgentGuide for this series, where we can store our notes and related resources. Don’t forget to check it out and share your feedback. Feel free to contribute or add missing content by submitting a pull request (PR).Stay tuned for the next part of the 2025 Voice AI Guide!

Imagine trying to teach a child who’s never seen the world to recognize a face, feel that fire is hot, or sense when it might rain. How would you do it?For centuries, we thought intelligence required something mystical a soul, consciousness, divine spark. But what if it’s just pattern recognition at an extraordinary scale? What if learning is simply tuning millions of tiny parameters until inputs map correctly to outputs?That’s the bold idea behind deep learning: mathematical systems that can learn any pattern, approximate any function, and tackle problems once thought uniquely human.In 1989, mathematicians proved the Universal Approximation Theorem showing that even a single hidden layer neural network can approximate any continuous function. In theory, such a network can learn to translate, recognize, play, or predict anything.But theory alone isn’t enough. The theorem says such a network exists not how to build or train it. That’s where the real craft of deep learning begins: finding the right weights, training efficiently, and learning patterns that generalize.Let’s unpack the six core ideas that make this possible.Note: This is a deep dive not a skim. Grab a coffee, settle in, and take your time. By the end, you’ll understand neural networks from the ground up, not just in words but in logic.1. Neural Networks: Universal Function ApproximatorsWhat Are We Trying to Do?Before we understand neural networks, let’s start with something simpler: what is a function?In mathematics, a function is a relationship that maps inputs to outputs. f(x) = 2x + 1 is a function. You give it x = 3, it returns 7. Simple, deterministic, predictable.But real-world problems involve functions we can’t write down. Consider:f(image) = "cat" or "dog"f(email_text) = "spam" or "not spam"f(patient_symptoms) = disease_probabilityThese are still functions they map inputs to outputs but we don’t know their mathematical form. Traditional programming can’t help us here because we can’t write explicit rules for every possible image or email.Building Blocks: The Artificial NeuronLet’s build from the ground up. Start with a single neuron the atomic unit of a neural network.A neuron does three things:Receives multiple inputs (x₁, x₂, x₃, …)Multiplies each input by a weight (w₁, w₂, w₃, …)Sums everything up and adds a bias: z = w₁x₁ + w₂x₂ + w₃x₃ + ... + bWhy this structure? Because it’s the simplest way to combine multiple pieces of information into a single decision.Geometry of a Neuron: Drawing a LineLet’s ground this in a real example.Problem: You’re a bank deciding whether to approve loans. You have two pieces of information:x₁ = Annual income (in thousands)x₂ = Credit scoreGoal: Separate “approve” from “reject” applications.A Single Neuron Creates a Line (2D) or Hyperplane (Higher Dimensions)The equation z = w₁x₁ + w₂x₂ + b is actually the equation of a line! Let's see how:Example neuron with specific weights:z = 0.5·income + 2·credit_score - 150This neuron outputs positive values for “approve” and negative for “reject”. The decision boundary is where z = 0:0 = 0.5·income + 2·credit_score - 150credit_score = 75 - 0.25·incomeThis is a line! Let’s plot it:What the weights mean geometrically:w₁ = 0.5: For every $1000 increase in income, the decision shifts by 0.5 units toward approvalw₂ = 2.0: For every 1-point increase in credit score, the decision shifts by 2 units toward approval (4× more important than income!)b = -150: The bias shifts the entire line. Without it, the line would pass through origin (0,0)The learning process is finding the right line:Start with a random line (random weights)See which points it classifies wrongAdjust the weights to rotate and shift the lineRepeat until the line best separates the two groupsWhat One Neuron Can and Cannot DoCannot separate (non-linearly separable):XOR is the classic example: you need (0,1) and (1,0) to be class 1, but (0,0) and (1,1) to be class 0. No single line can achieve this separation.This is why we need multiple layers.Multiple Neurons, Multiple Lines: Building Complex BoundariesIf one neuron creates one line, what happens with multiple neurons in one layer?Example: 3 neurons in one layerNeuron 1: z₁ = w₁₁x₁ + w₁₂x₂ + b₁ [Line 1]Neuron 2: z₂ = w₂₁x₁ + w₂₂x₂ + b₂ [Line 2]Neuron 3: z₃ = w₃₁x₁ + w₃₂x₂ + b₃ [Line 3]Each neuron draws a different line! But without additional layers, we still can’t solve XOR. Why? Because we’re just drawing multiple lines without combining them in complex ways.The key insight: We need to combine these lines non-linearly. This is where activation functions and depth come in.The Layer AbstractionNow stack multiple neurons side by side that’s a layer. Each neuron in the layer:Receives the same inputsHas its own unique weights and biasProduces its own outputA layer with 10 neurons transforms one input vector into 10 different outputs, each representing a different “feature” or “pattern” it has detected.Solving XOR: A Complete ExampleLet’s solve XOR step-by-step to understand how layers work together.The XOR Problem:Input (x₁, x₂) → Output(0, 0) → 0(0, 1) → 1(1, 0) → 1(1, 1) → 0Two-Layer Solution:Layer 1: Create useful features (2 neurons with ReLU)Neuron 1: Detects “at least one input is 1”z₁ = x₁ + x₂ - 0.5a₁ = ReLU(z₁)Testing:(0,0): z₁ = -0.5, a₁ = 0(0,1): z₁ = 0.5, a₁ = 0.5(1,0): z₁ = 0.5, a₁ = 0.5(1,1): z₁ = 1.5, a₁ = 1.5Neuron 2: Detects “both inputs are 1”z₂ = x₁ + x₂ - 1.5a₂ = ReLU(z₂)Testing:(0,0): z₂ = -1.5, a₂ = 0(0,1): z₂ = -0.5, a₂ = 0(1,0): z₂ = -0.5, a₂ = 0(1,1): z₂ = 0.5, a₂ = 0.5Layer 2: Combine features (1 neuron with Sigmoid)z₃ = a₁ - 2·a₂ - 0.25output = Sigmoid(z₃)Testing:(0,0): z₃ = 0 - 0 - 0.25 = -0.25 → ≈0 ✓(0,1): z₃ = 0.5 - 0 - 0.25 = 0.25 → ≈1 ✓(1,0): z₃ = 0.5 - 0 - 0.25 = 0.25 → ≈1 ✓(1,1): z₃ = 1.5 - 1 - 0.25 = 0.25 → ≈0 ✓What happened geometrically?Layer 1 transformed the space:The first layer created new features where the problem becomes linearly separable!a₁ captures “OR-ness” (at least one is true)a₂ captures “AND-ness” (both are true)Layer 2 drew a simple line in this new space:a₁ - 2·a₂ = 0.25 [decision boundary]This line easily separates XOR in the transformed space!The key insight:Layer 1: Creates useful intermediate features by drawing multiple lines/planesLayer 2: Combines these features with another line/planeTogether: They can represent any decision boundary!The Complete ArchitectureA typical neural network:Input Layer (raw data) → Hidden Layer 1 (low-level features) → Hidden Layer 2 (mid-level features) → Hidden Layer 3 (high-level features) → Output Layer (predictions)The power lies not in any single neuron, but in the billions of connections between them, each with its own weight, collectively forming a function approximator of extraordinary flexibility.Universal Approximation TheoremThe Universal Approximation Theorem (1989) proves:A neural network with just one hidden layer can approximate any continuous function, given enough neurons.But “enough” might mean billions, which is impractical.Deep (multi-layer) networks achieve the same expressive power more efficiently through hierarchical composition like compression for abstractions.So, in theory, neural networks can learn any mapping; in practice, depth makes it tractable.2. Activation Functions: Breaking LinearityThe Linear Trap: A Fundamental ProblemImagine we build a neural network with three layers, but we don’t use activation functions. Let’s trace through what happens mathematically:Layer 1: z₁ = W₁x + b₁Layer 2: z₂ = W₂z₁ + b₂ = W₂(W₁x + b₁) + b₂ = W₂W₁x + W₂b₁ + b₂Layer 3: z₃ = W₃z₂ + b₃ = W₃(W₂W₁x + W₂b₁ + b₂) + b₃Simplifying: z₃ = (W₃W₂W₁)x + (W₃W₂b₁ + W₃b₂ + b₃)Notice what happened? No matter how many layers we add, we always end up with: Wx + b a simple linear function. Matrix multiplication of matrices is still a matrix. We've built an expensive way to do simple linear regression.This is catastrophic. Linear functions can only model linear relationships. The real world is non-linear. The path of a thrown ball, the spread of a virus, the relationship between study time and test scores — all non-linear.The Solution: Non-Linear Activation FunctionsAfter each neuron computes its weighted sum, we pass it through a non-linear activation function: a = σ(z)This single addition breaks the linear trap. Now our layers actually do different things, building increasingly complex representations.What Makes a Good Activation Function?Let’s think about what properties we need:Non-linearity (obviously, or we’re back where we started)Differentiability (we’ll need derivatives for learning)Computational efficiency (we’ll apply it billions of times)Avoid saturation (outputs shouldn’t always be at extremes)Zero-centered or positive (depending on the problem)Common Activation FunctionsReLU (Rectified Linear Unit): f(x) = max(0, x)Why it works:Dead simple: if input is positive, output equals input; if negative, output is zeroNon-linear despite looking linear (the “kink” at zero creates non-linearity)Computationally trivial: just one comparison and zero multiplicationDoesn’t saturate for positive values (unlike sigmoid)Induces sparsity: many neurons output exactly zero, creating efficient representationsThe problem:“Dying ReLU”: if a neuron’s weights push it permanently into negative territory, its gradient becomes zero and it stops learning foreverNot zero-centered: all outputs are positive, which can slow convergenceVariants:Leaky ReLU: f(x) = max(0.01x, x) — allows small gradients when x < 0, preventing deathELU (Exponential Linear Unit): Smooth curve for negative values, better learning dynamicsSigmoid: f(x) = 1/(1 + e^(-x))Why it exists:Squashes any input into range (0, 1)Historically motivated by biological neurons (firing rates between 0 and 1)Output can be interpreted as probabilitywhat’s happening?For large positive x: e^(-x) approaches 0, so output approaches 1For large negative x: e^(-x) approaches infinity, so output approaches 0At x = 0: output is 0.5Why it’s problematic:Vanishing gradients: For large positive or negative inputs, the sigmoid is nearly flat. The derivative approaches zero. During backpropagation, gradients get multiplied across layers; zeros multiply to deepen zeros. Deep networks can’t learn.Not zero-centered: Outputs always positive (0 to 1), causing zig-zagging during optimizationComputationally expensive: Exponential functionWhere it’s still used:Output layer for binary classification (want probability between 0 and 1)Tanh: f(x) = (e^x - e^(-x))/(e^x + e^(-x))Advantages over sigmoid:Zero-centered: outputs range from -1 to 1Stronger gradients: derivative at zero is 1 (compared to 0.25 for sigmoid)Still suffers from:Vanishing gradients for extreme valuesComputational cost of exponentialsSoftmax: f(x_i) = e^(x_i) / Σe^(x_j)Completely different purpose:Not used between hidden layersExclusively for multi-class classification output layersIn simple termsTakes a vector of arbitrary values (logits)Converts them into probabilities that sum to 1Exponentiation ensures all values are positiveDivision by sum ensures they sum to 1Higher inputs get exponentially higher probabilitiesExample:Input: [2.0, 1.0, 0.1]After softmax: [0.659, 0.242, 0.099]Notice: still ordered the same way, but now they’re probabilitiesWhy Different Layers Need Different ActivationsHidden Layers: ReLU family (efficiency, avoiding vanishing gradients)Binary Classification Output: Sigmoid (get probability for one class)Multi-class Classification Output: Softmax (get probability distribution over all classes)Regression Output: Often no activation (or linear) — we want the raw value, not a bounded one3. Forward Propagation: The Prediction ProcessWhat is Propagation?“Propagation” is just a fancy word for “passing information through.” Forward propagation is the process of taking input data and pushing it through every layer until we get a prediction.Let’s build this concept from absolute scratch.The Single Neuron CaseYou have:Input: x = 3Weight: w = 2Bias: b = 1Step 1: Linear combination z = wx + b = 2(3) + 1 = 7Step 2: Activation a = ReLU(z) = max(0, 7) = 7That’s it. The neuron outputs 7. This output might be the final prediction (if it’s the only neuron), or it might be input to the next layer.Multiple Inputs, Single NeuronNow you have three inputs:Inputs: x = [x₁=2, x₂=3, x₃=1]Weights: w = [w₁=0.5, w₂=-1, w₃=2]Bias: b = 1Step 1: Weighted sumz = w₁x₁ + w₂x₂ + w₃x₃ + bz = 0.5(2) + (-1)(3) + 2(1) + 1z = 1 - 3 + 2 + 1 = 1Step 2: Activation a = ReLU(1) = 1Single Layer: Multiple NeuronsNow suppose we have 3 neurons in one layer, all receiving the same 3 inputs.Neuron 1:Weights: [w₁₁, w₁₂, w₁₃], Bias: b₁Output: a₁ = ReLU(w₁₁x₁ + w₁₂x₂ + w₁₃x₃ + b₁)Neuron 2:Weights: [w₂₁, w₂₂, w₂₃], Bias: b₂Output: a₂ = ReLU(w₂₁x₁ + w₂₂x₂ + w₂₃x₃ + b₂)Neuron 3:Weights: [w₃₁, w₃₂, w₃₃], Bias: b₃Output: a₃ = ReLU(w₃₁x₁ + w₃₂x₃₃ + w₃₃x₃ + b₃)The layer transforms input vector [x₁, x₂, x₃] into output vector [a₁, a₂, a₃]Matrix Representation: Scaling to Thousands of NeuronsWriting out every neuron individually is tedious. We use matrix notation:Weight Matrix W:W = [w₁₁ w₁₂ w₁₃] [w₂₁ w₂₂ w₂₃] [w₃₁ w₃₂ w₃₃]Each row represents one neuron’s weights.Input Vector x:x = [x₁] [x₂] [x₃]Forward propagation for the layer:z = Wx + ba = ReLU(z)This single matrix multiplication computes all neurons simultaneously. With modern GPUs optimized for matrix operations, we can process thousands of neurons in parallel.Deep Networks: Chaining LayersNow stack multiple layers. The output of layer 1 becomes the input to layer 2:Layer 1:z¹ = W¹x + b¹a¹ = ReLU(z¹)Layer 2:z² = W²a¹ + b²a² = ReLU(z²)Layer 3 (output):z³ = W³a² + b³ŷ = softmax(z³) [if classification]The final output ŷ is our prediction.Concrete Example: Digit RecognitionInput: 28×28 pixel image of a handwritten digit (flattened to 784 values)Architecture:Input layer: 784 neuronsHidden layer 1: 128 neurons (with ReLU)Hidden layer 2: 64 neurons (with ReLU)Output layer: 10 neurons (with softmax for digits 0–9)Forward propagation:z¹ = W¹x + b¹ [128 values]a¹ = ReLU(z¹) [128 values]z² = W²a¹ + b² [64 values]a² = ReLU(z²) [64 values]z³ = W³a² + b³ [10 values]ŷ = softmax(z³) [10 probabilities summing to 1]Output might be: [0.01, 0.02, 0.05, 0.7, 0.1, 0.05, 0.03, 0.02, 0.01, 0.01]The network predicts “3” with 70% confidence (index 3 has highest probability).Why “Forward”?Because information flows in one direction: from input → through hidden layers → to output. No loops, no feedback (in standard feedforward networks). Each layer only looks forward, never backward.Later, during learning, we’ll propagate in the opposite direction (backward) to adjust weights. But prediction is always forward.4. Loss Functions: Quantifying ErrorWhy Do We Need Loss?Imagine you’re teaching a child to draw circles. They draw something. How do you tell them how “wrong” it is? You need a measurement some way to quantify the difference between what they drew and a perfect circle.Neural networks face the same problem. After forward propagation, we have a prediction ŷ. We also have the true answer y. The loss function L(ŷ, y) measures how wrong the prediction is.This single number is crucial because:It tells us how well the model is performingIt guides the learning process (we’ll adjust weights to minimize this number)Different problems need different ways of measuring “wrongness”Property Requirements for Loss FunctionsNon-negative: L ≥ 0 always (can't be "negative wrong")Zero when perfect: L = 0 when ŷ = y exactlyIncreases with error: Worse predictions → higher lossDifferentiable: We need gradients for learning (calculus requirement)Appropriate for the task: Regression vs classification need different measuresMean Squared Error (MSE): For RegressionThe Problem: Predict a continuous value (house price, temperature, stock price)The most intuitive approach: absolute difference |ŷ - y|If true value is 100 and we predict 90, error = 10Simple, interpretableBut there’s a problem: absolute value isn’t differentiable at zero (the derivative has a discontinuity). This complicates learning algorithms.Better approach: Square the differenceL = (ŷ - y)²Why squaring?Always positive (negative errors don’t cancel positive ones)Differentiable everywhere: dL/dŷ = 2(ŷ - y)Penalizes large errors more (error of 10 contributes 100, but error of 1 contributes only 1)Mathematically convenient (leads to elegant solutions)For multiple predictions (a batch):MSE = (1/n) Σᵢ(ŷᵢ - yᵢ)²We average across all samples to get a single loss value.Concrete Example:Predicting house pricesTrue prices: [200k, 300k, 250k]Predicted: [210k, 280k, 255k]Errors: [10k, -20k, 5k]Squared errors: [100M, 400M, 25M]MSE = (100M + 400M + 25M) / 3 = 175MThe large middle error dominates the loss, signaling that’s where improvement is needed most.Variant: MAE (Mean Absolute Error)MAE = (1/n) Σᵢ|ŷᵢ - yᵢ|More robust to outliers (doesn’t square them)Less sensitive to large errorsHarder to optimize (non-smooth at zero)Cross-Entropy Loss: For ClassificationThe Problem: Predict discrete categories (cat vs dog, spam vs ham, digit 0–9)MSE doesn’t work well here. Why? Because classification outputs are probabilities, and we need to measure “how wrong” a probability distribution is.Binary Cross-Entropy (Two Classes)Setup:True label: y ∈ {0, 1} (e.g., 0 = not spam, 1 = spam)Predicted probability: ŷ ∈ [0, 1] (from sigmoid activation)If true label is 1 (positive class):If we predict ŷ = 1.0 (certain it’s positive): perfect, loss should be 0If we predict ŷ = 0.9 (very confident): small lossIf we predict ŷ = 0.5 (uncertain): moderate lossIf we predict ŷ = 0.1 (confident it’s negative): large lossIf we predict ŷ = 0.0 (certain it’s negative): infinite loss (catastrophically wrong)The formula that captures this:L = -[y·log(ŷ) + (1-y)·log(1-ŷ)]Why this works:Case 1: y = 1 (true class is positive)L = -log(ŷ)If ŷ = 1: L = -log(1) = 0 ✓If ŷ = 0.5: L = -log(0.5) ≈ 0.69If ŷ = 0.1: L = -log(0.1) ≈ 2.30If ŷ → 0: L → ∞ (massive penalty for confident wrong answer)Case 2: y = 0 (true class is negative)L = -log(1-ŷ)If ŷ = 0: L = -log(1) = 0 ✓If ŷ = 0.5: L = -log(0.5) ≈ 0.69If ŷ = 0.9: L = -log(0.1) ≈ 2.30If ŷ → 1: L → ∞The logarithm creates the right penalty structure: small errors have small losses, but confident mistakes are punished severely.Why “cross-entropy”?It comes from information theory. Cross-entropy measures the average number of bits needed to encode data from one distribution using another distribution. Here, we’re measuring the “distance” between the true distribution (y) and predicted distribution (ŷ).Categorical Cross-Entropy (Multiple Classes)Setup:True label: one-hot encoded vector (e.g., [0, 0, 1, 0, 0] for class 3)Predicted: probability distribution from softmax (e.g., [0.1, 0.2, 0.5, 0.15, 0.05])Formula:L = -Σᵢ yᵢ·log(ŷᵢ)Since y is one-hot (only one element is 1, rest are 0), this simplifies to:L = -log(ŷ_true_class)Example: Digit classification (0–9)True label: 7 → one-hot: [0,0,0,0,0,0,0,1,0,0]Predicted: [0.05, 0.05, 0.1, 0.05, 0.05, 0.05, 0.1, 0.4, 0.1, 0.05]Loss = -log(0.4) ≈ 0.916If the model had predicted 7 with 0.9 probability: Loss = -log(0.9) ≈ 0.105 (much better)Intuition: We only care about the probability assigned to the correct class. The loss increases as this probability decreases.Choosing the Right Loss FunctionRegression (predicting continuous values):MSE: Standard choice, penalizes large errors heavilyMAE: More robust to outliersHuber Loss: Combines benefits of both (MSE for small errors, MAE for large)Binary Classification:Binary Cross-Entropy: Standard choice when using sigmoid outputMulti-class Classification:Categorical Cross-Entropy: When labels are one-hot encodedSparse Categorical Cross-Entropy: When labels are integers (more memory efficient)Custom Loss Functions: Sometimes you need domain-specific losses. For example:Medical diagnosis: False negatives might be more costly than false positivesImage generation: Perceptual losses that compare high-level features, not pixelsReinforcement learning: Reward-based lossesThe loss function is the objective we’re optimizing. Choose it carefully — your model will become excellent at minimizing it, for better or worse.5. Backpropagation: The Learning AlgorithmThis step is crucial it’s where the real learning happens.Our neural network has millions of tiny adjustable numbers called weights. We make a prediction, compare it with the correct answer, and realize we’re off. The big question is: how do we tweak those millions of weights to make the next prediction better?It’s not as simple as it sounds. Each weight affects many others, and changing even one can ripple through the entire network. Should we increase it or decrease it? And by how much?That’s where backpropagation comes in a beautifully systematic way to figure out exactly how every single weight should change to reduce the overall error.To really grasp what’s happening here, you’ll need a bit of comfort with calculus, especially with derivatives and how small changes in one variable affect another.The Core Insight: The Chain Rule of CalculusEverything in backpropagation stems from one calculus concept: the chain rule.Simple example: If z = f(y) and y = g(x), then:dz/dx = (dz/dy) · (dy/dx)In words: The rate of change of z with respect to x equals the rate of change of z with respect to y, multiplied by the rate of change of y with respect to x.This might seem abstract, so let’s make it concrete.Concrete Example: A Tiny NetworkArchitecture:One input: x = 2One weight: w = 3One bias: b = 1Activation: ReLUTrue output: y = 15Forward pass:z = wx + b = 3(2) + 1 = 7a = ReLU(z) = 7L = (a - y)² = (7 - 15)² = 64Loss is 64. We want to reduce it. Should we increase or decrease w?Backward pass (backpropagation):We need dL/dw (how much does loss change when we change w?).Using the chain rule:dL/dw = (dL/da) · (da/dz) · (dz/dw)Let’s calculate each piece:Step 1: dL/da (how does loss change with activation?)L = (a - y)²dL/da = 2(a - y) = 2(7 - 15) = -16Step 2: da/dz (how does activation change with pre-activation?)a = ReLU(z) = max(0, z)For z > 0: da/dz = 1For z ≤ 0: da/dz = 0Since z = 7 > 0: da/dz = 1Step 3: dz/dw (how does pre-activation change with weight?)z = wx + bdz/dw = x = 2Combine them:dL/dw = (dL/da) · (da/dz) · (dz/dw)dL/dw = (-16) · (1) · (2) = -32Interpretation: The gradient is -32. This means:If we increase w by a tiny amount, the loss will decrease by approximately 32 times that amountThe negative sign tells us to increase w (move opposite to the gradient)The magnitude (32) tells us how sensitive the loss is to changes in wUpdate the weight:w_new = w_old - learning_rate · (dL/dw)w_new = 3 - 0.01 · (-32) = 3 + 0.32 = 3.32We’ve just learned! The network adjusted its weight to reduce the loss.Scaling to Deep NetworksIn real networks with many layers, we calculate gradients layer by layer, moving backward from the output.Example: 3-layer networkForward pass:Layer 1: z¹ = W¹x + b¹, a¹ = ReLU(z¹)Layer 2: z² = W²a¹ + b², a² = ReLU(z²)Layer 3: z³ = W³a² + b³, ŷ = softmax(z³)Loss: L = CrossEntropy(ŷ, y)Backward pass:Layer 3 (output layer):dL/dz³ = ŷ - y [derivative of softmax + cross-entropy]dL/dW³ = (dL/dz³) · a²ᵀdL/db³ = dL/dz³dL/da² = W³ᵀ · (dL/dz³) [pass gradient to previous layer]Layer 2:dL/dz² = (dL/da²) ⊙ ReLU'(z²) [⊙ is element-wise multiplication]dL/dW² = (dL/dz²) · a¹ᵀdL/db² = dL/dz²dL/da¹ = W²ᵀ · (dL/dz²)Layer 1:dL/dz¹ = (dL/da¹) ⊙ ReLU'(z¹)dL/dW¹ = (dL/dz¹) · xᵀdL/db¹ = dL/dz¹Notice the pattern:Calculate gradient with respect to pre-activation (z)Calculate gradient for weights: dL/dW = (dL/dz) · inputᵀCalculate gradient for bias: dL/db = dL/dzPass gradient backward: dL/d(previous_activation) = Wᵀ · (dL/dz)Why “Backpropagation”?Because we propagate gradients backward through the network, from output to input. Each layer receives the gradient from the layer ahead, computes its own gradients, and passes gradients to the layer behind.The Vanishing Gradient ProblemFundamental issue in deep networks:When we multiply many small numbers (gradients) together through many layers, the product can become vanishingly small — approaching zero.Example: If each layer has gradient 0.1, after 10 layers:0.1¹⁰ = 0.0000000001The early layers receive essentially zero gradient and stop learning. The network is deep but only the last few layers are actually training.Solutions:ReLU activation: Gradient is 1 for positive inputs (doesn’t shrink)Residual connections: Skip connections that allow gradients to bypass layersBatch normalization: Keeps activations in a healthy rangeCareful initialization: Start with weights that don’t lead to extreme activationsThe Exploding Gradient ProblemThe opposite issue: gradients grow exponentially.If each layer has gradient 2, after 10 layers:2¹⁰ = 1024Weights update by huge amounts, causing wild oscillations and instability. The model never converges.Solutions:Gradient clipping: Cap gradients at a maximum valueCareful initialization: Start with smaller weightsBatch normalization: Stabilizes the scale of activations and gradientsLower learning rates: Smaller update stepsComputational Efficiency: Why Backpropagation is BrilliantNaive approach to finding gradients: For each weight, we could:Make a tiny change: w → w + εRecalculate the entire lossCompute: (L_new - L_old) / εFor a network with 1 million weights, this requires 1 million forward passes. Computationally prohibitive.Backpropagation insight: Calculate all gradients in a single backward pass by reusing intermediate calculations. For N weights, we need:1 forward pass1 backward passThat’s it. Backpropagation computes all million gradients with just two passes through the network. This is why deep learning became practical.The Mathematics: Derivatives of Common ComponentsReLU:f(x) = max(0, x)f'(x) = 1 if x > 0, else 0Sigmoid:σ(x) = 1/(1 + e^(-x))σ'(x) = σ(x)(1 - σ(x)Tanh:tanh(x) = (e^x - e^(-x))/(e^x + e^(-x))tanh'(x) = 1 - tanh²(x)Softmax + Cross-Entropy (combined):dL/dz = ŷ - yThis remarkably simple gradient is why we use softmax with cross-entropy.MSE:L = (ŷ - y)²dL/dŷ = 2(ŷ - y)Memory RequirementsBackpropagation requires storing all activations from the forward pass to compute gradients in the backward pass. For a network with:Batch size: 324 layers with 1000 neurons eachWe must store: 32 × 4 × 1000 = 128,000 activation values in memory.This is why training large models requires substantial GPU memory, and why techniques like gradient checkpointing (recomputing some activations rather than storing them) become necessary.6. Gradient Descent: The Optimization AlgorithmImagine you’re standing on a mountain in thick fog. You can’t see the bottom of the valley, but you can feel the slope beneath your feet. Your goal: reach the lowest point.Strategy: Take a step in the direction of steepest descent.This is gradient descent. The “mountain” is the loss landscape — a high-dimensional surface where each dimension represents one weight, and the height represents the loss.The Mathematical FoundationAfter backpropagation, we have gradients: ∂L/∂w₁, ∂L/∂w₂, ..., ∂L/∂wₙEach gradient tells us:Direction: Positive gradient means loss increases when weight increasesMagnitude: Large gradient means weight strongly affects lossGradient descent update rule:w_new = w_old - α · (∂L/∂w)Where α (alpha) is the learning rate.Why subtract? The gradient points in the direction of increasing loss. We want to decrease loss, so we move in the opposite direction (negative gradient).The Learning Rate: The Most Critical HyperparameterThe learning rate controls the step size. Choosing it is an art and science.Too large (α = 1.0):Iteration 1: Loss = 100Iteration 2: Loss = 250 [overshot the minimum]Iteration 3: Loss = 80Iteration 4: Loss = 300 [wild oscillations]...never convergesToo small (α = 0.000001):Iteration 1: Loss = 100.00Iteration 2: Loss = 99.99Iteration 3: Loss = 99.98...painfully slow, might get stuck in local minimumJust right (α = 0.01):Iteration 1: Loss = 100Iteration 2: Loss = 85Iteration 3: Loss = 73...steady progress toward minimumTypical ranges:Small networks: 0.001–0.01Large networks: 0.0001–0.001With Adam optimizer: 0.001 (default)Variants of Gradient Descent1. Batch Gradient DescentApproach: Use the entire dataset to compute one gradient update.for epoch in range(num_epochs): # Compute gradient using ALL training samples gradient = compute_gradient(all_data) weights = weights - learning_rate * gradientPros:Smooth convergenceGuaranteed to find the minimum (for convex functions)Cons:Slow: One update per epochMemory intensive: Must load entire datasetGets stuck in local minima (for non-convex functions)2. Stochastic Gradient Descent (SGD)Approach: Use one random sample at a time.for epoch in range(num_epochs): shuffle(data) for sample in data: # Compute gradient using ONE sample gradient = compute_gradient(sample) weights = weights - learning_rate * gradientPros:Fast updates: One update per sampleCan escape local minima (due to noise)Memory efficientCons:Noisy updates: path to minimum is erraticDoesn’t fully utilize parallel computing (GPUs)May oscillate around minimum without settling3. Mini-Batch Gradient Descent (Most Common)Approach: Use a small batch of samples (typically 32, 64, 128, or 256).for epoch in range(num_epochs): shuffle(data) for batch in create_batches(data, batch_size=32): # Compute gradient using BATCH of samples gradient = compute_gradient(batch) weights = weights - learning_rate * gradientPros:Balanced: More stable than SGD, faster than batch GDEfficient: Perfect for GPU parallelizationModerate memory usageNoise helps escape local minima, but not too muchCons:Another hyperparameter to tune (batch size)This is the standard in modern deep learning.Advanced Optimizers: Beyond Basic Gradient DescentBasic gradient descent treats all parameters equally and uses a fixed learning rate. Modern optimizers are more sophisticated.MomentumProblem with basic GD: Imagine a narrow valley: steep sides, gentle slope toward minimum. Basic GD oscillates between sides while slowly progressing forward.Solution: Momentumvelocity = 0for iteration: gradient = compute_gradient() velocity = β * velocity - learning_rate * gradient weights = weights + velocityIntuition: Remember previous gradients. If we keep going in the same direction, accelerate. If we oscillate, dampen the movement.Effect:Faster convergence in consistent directionsReduced oscillationsCan roll through small local minimaTypical β: 0.9 (use 90% of previous velocity)RMSprop (Root Mean Square Propagation)Problem: Some parameters need large updates, others need small ones. A single learning rate is suboptimal.Solution: Adapt the learning rate for each parameter based on recent gradient magnitudes.squared_gradient_avg = 0for iteration: gradient = compute_gradient() squared_gradient_avg = β * squared_gradient_avg + (1-β) * gradient² adjusted_gradient = gradient / (sqrt(squared_gradient_avg) + ε) weights = weights - learning_rate * adjusted_gradientIntuition:Parameters with consistently large gradients get smaller effective learning rates (divided by large number)Parameters with small gradients get larger effective learning rates (divided by small number)Effect: Each parameter gets its own adaptive learning rate.Adam (Adaptive Moment Estimation)The gold standard: Combines momentum and RMSprop.m = 0 # first moment (momentum)v = 0 # second moment (RMSprop)for iteration: gradient = compute_gradient() # Update moments m = β₁ * m + (1-β₁) * gradient v = β₂ * v + (1-β₂) * gradient² # Bias correction (important in early iterations) m_corrected = m / (1 - β₁^t) v_corrected = v / (1 - β₂^t) # Update weights weights = weights - learning_rate * m_corrected / (sqrt(v_corrected) + ε)Why Adam dominates:Combines best of both worlds: momentum + adaptive learning ratesRobust to hyperparameter choices (default values work well)Efficient and converges quicklyWorks across diverse problem typesDefault hyperparameters:learning_rate = 0.001β₁ = 0.9 (momentum)β₂ = 0.999 (RMSprop)ε = 1e-8 (numerical stability)Learning Rate SchedulesEven with Adam, learning rates can be adjusted during training.1. Step DecayEpochs 1-30: lr = 0.001Epochs 31-60: lr = 0.0001Epochs 61+: lr = 0.00001Why: Start with larger steps to quickly find the general region, then smaller steps to fine-tune.2. Exponential Decaylr(t) = lr₀ * e^(-kt)Smoothly decreases learning rate over time.3. Cosine Annealinglr(t) = lr_min + 0.5 * (lr_max - lr_min) * (1 + cos(πt/T))Gradually reduces learning rate following a cosine curve.4. Warm RestartsPeriodically reset learning rate to initial value. Helps escape local minima by occasionally taking large steps again.5. Learning Rate WarmupStart with very small learning rate, gradually increase to target value over first few epochs. Prevents instability in early training.The Convergence Question: When to Stop?Training loss keeps decreasing but should we keep training?Early StoppingConcept: Monitor performance on a validation set (data the model hasn’t trained on).Epoch 1: Train Loss = 2.5, Val Loss = 2.6Epoch 5: Train Loss = 1.2, Val Loss = 1.3Epoch 10: Train Loss = 0.8, Val Loss = 0.9Epoch 15: Train Loss = 0.4, Val Loss = 0.85 [val loss stopped decreasing]Epoch 20: Train Loss = 0.2, Val Loss = 0.9 [val loss increasing!]Stop at epoch 10: Model is starting to overfit (memorizing training data rather than learning generalizable patterns).Implementation:best_val_loss = infinitypatience = 5 # epochs to wait for improvementpatience_counter = 0for epoch: train() val_loss = validate() if val_loss < best_val_loss: best_val_loss = val_loss save_model() patience_counter = 0 else: patience_counter += 1 if patience_counter >= patience: print("Early stopping!") breakChallenges in the Optimization LandscapeLocal MinimaThe loss surface has multiple valleys. Gradient descent might settle into a shallow local minimum instead of the deep global minimum.Solutions:Momentum (can roll over small bumps)Multiple random initializationsStochastic updates (noise helps escape)Saddle PointsPoints where gradient is zero but it’s neither a minimum nor maximum — a “saddle” shape. More common than local minima in high dimensions.Solutions:Momentum helps push throughSecond-order methods (Newton’s method)PlateausFlat regions where gradients are nearly zero. Progress stalls.Solutions:Adaptive learning rates (Adam)Patience (eventually gradients increase again)Batching and ParallelizationWhy batches matter for GPUs:Modern GPUs have thousands of cores. Computing gradients for 32 samples independently is slow. Computing them in parallel is fast.Matrix operations on batches:Input batch: [32 × 784] (32 images, 784 pixels each)Weights: [784 × 128]Output: [32 × 128] (32 outputs, 128 neurons)Single matrix multiplication computes all 32 samples simultaneously. This is why GPUs are essential for deep learning.Batch size trade-offs:Small batches (e.g., 8–32):More frequent updatesMore noise (helps generalization)Less memorySlower per epochLarge batches (e.g., 256–1024):Fewer updates per epochSmoother gradientsMore memory requiredFaster per epochRisk of poor generalization (too smooth)Sweet spot: Usually 32–128 for most applications.The Complete Training Loop: Putting It All TogetherNow we understand all the pieces. Here’s how they work together:Initialization# Initialize weights (Xavier/He initialization)for layer in network: layer.weights = random_normal(0, sqrt(2/n_inputs)) layer.biases = zeros()# Initialize optimizeroptimizer = Adam(learning_rate=0.001)Why careful initialization matters:Too large: Exploding activations and gradientsToo small: Vanishing gradientsXavier/He initialization: Scaled to maintain activation variance across layersThe Training Loopfor epoch in range(num_epochs): # Shuffle data for randomness shuffle(training_data) for batch in create_batches(training_data, batch_size=32): # 1. FORWARD PROPAGATION x, y_true = batch z1 = W1 @ x + b1 a1 = relu(z1) z2 = W2 @ a1 + b2 a2 = relu(z2) z3 = W3 @ a2 + b3 y_pred = softmax(z3) # 2. COMPUTE LOSS loss = cross_entropy(y_pred, y_true) # 3. BACKPROPAGATION dL_dz3 = y_pred - y_true dL_dW3 = dL_dz3 @ a2.T dL_db3 = sum(dL_dz3, axis=0) dL_da2 = W3.T @ dL_dz3 dL_dz2 = dL_da2 * relu_derivative(z2) dL_dW2 = dL_dz2 @ a1.T dL_db2 = sum(dL_dz2, axis=0) dL_da1 = W2.T @ dL_dz2 dL_dz1 = dL_da1 * relu_derivative(z1) dL_dW1 = dL_dz1 @ x.T dL_db1 = sum(dL_dz1, axis=0) # 4. OPTIMIZATION (using Adam) W3, b3 = optimizer.update(W3, b3, dL_dW3, dL_db3) W2, b2 = optimizer.update(W2, b2, dL_dW2, dL_db2) W1, b1 = optimizer.update(W1, b1, dL_dW1, dL_db1) # 5. VALIDATION val_loss = evaluate(validation_data) print(f"Epoch {epoch}: Train Loss = {loss:.4f}, Val Loss = {val_loss:.4f}") # 6. EARLY STOPPING CHECK if should_stop(val_loss): break# 7. FINAL EVALUATIONtest_accuracy = evaluate(test_data)print(f"Final Test Accuracy: {test_accuracy:.2%}")What Happens Over TimeEpoch 1:Weights are randomPredictions are terrible (10% accuracy on 10 classes = random guessing)Loss is high (maybe 2.3)Large gradientsBig weight updatesEpoch 10:Network learned basic patternsAccuracy improved to 60%Loss decreased to 1.2Moderate gradientsSteady learningEpoch 50:Network refined understandingAccuracy at 92%Loss at 0.3Small gradientsFine-tuning detailsEpoch 100:Diminishing returnsAccuracy 93% (validation starting to plateau)Risk of overfittingTime to stopMonitoring Training: What to Watch1. Training LossShould decrease steadilyIf fluctuating wildly: learning rate too highIf barely moving: learning rate too low or stuck in minimum2. Validation LossShould track training loss initiallyIf diverging: overfittingIf much higher from start: train/val data distribution mismatch3. Gradient NormsShould be moderate (0.001–1.0)If very small (< 0.0001): vanishing gradientsIf very large (> 10): exploding gradients4. Activation StatisticsMean should be near zeroStd should be moderate (~1)If activations saturate (all 0 or all max): architectural problem5. Learning RateCan be adjusted based on progressToo aggressive: divergenceToo conservative: slow progressConclusion: The Symphony of LearningMachine learning is not one algorithm — it’s a carefully orchestrated system:Architecture provides the capacity to represent complex functions (Universal Approximation Theorem)Activation functions enable non-linear transformationsForward propagation generates predictionsLoss functions quantify errorBackpropagation computes gradients efficientlyGradient descent iteratively improves weightsEach component is essential. Remove any one, and learning fails.The beauty lies in the simplicity of each piece and the power of their combination. From these building blocks — matrix multiplications, non-linear functions, derivatives, and iterative updates — emerges the capability to:Recognize faces in photosTranslate between languagesGenerate realistic imagesPlay games at superhuman levelsPredict protein structuresDrive cars autonomouslyAll from the same fundamental algorithm, repeated billions of times, gradually sculpting random weights into a representation of the world’s patterns.This is how machines learn: not through magic, but through mathematics, iteration, and the elegant interplay of calculus and optimization across high-dimensional spaces.
